How To Clean Your Keyboard - A Step By Step Guide


Computer keyboards can get dirty very easily when they are not properly taken care of. Stores sell compressed air and cleaning products to help you clean your keyboard. Many people have their own way of cleaning their keyboards, but most people usually just flip it upside down and shake it. Those who do spend money on compressed air or cleaning products, you are wasting money and time. Compressed air won't always give you a thorough clean because most of the dirt is trapped underneath the keys. The air does blow out some dirt; however it creates more of a mess for you to clean up.
In this guide I will show you how to thoroughly clean you keyboard with some simple household items. When you reach the end of this guide, your keyboard should look as clean as it was the day you bought it. A quick reminder for everyone who follows this guide: I cannot be held liable for any damage that is done to your keyboard. If you follow the directions and do it correctly and carefully, your keyboard will work perfectly fine.
First, shutdown your computer and unplug the keyboard. Remember which socket you unplugged the keyboard from so that you can easily plug it back in. Next, I suggest you find an open area to work; one that is not crowded.
Now, take a picture of your keyboard or write down where the keys are located. You will need this as your reference when putting the keys back in the keyboard, unless you have a photographic memory?
I will be using my cordless Logitech Elite keyboard for this guide. I cleaned my keyboard about two months ago, but knowing me, it will be pretty dirty inside.
What You Will Need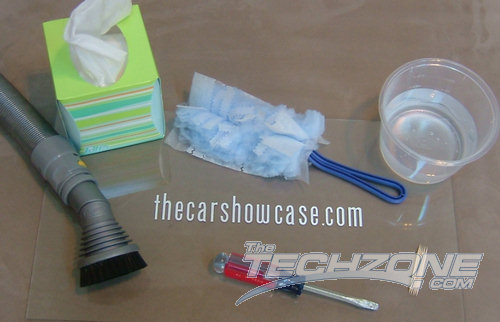
You will need several household items for this project:
* Tissues
* Dust pad
* Vacuum Cleaner
* Screwdriver
* Toothpicks
* Cup of water (optional)
* Q-tips (optional)

With your work area set, lay the keyboard on a flat surface. Turn on the vacuum and using an attachment, run over the surface of the keyboard trying to suck up any loose materials. I recommend using the attachment that has bristles on the end; it is very effective when trying to get into all the cracks. 
Shutoff the vacuum and get your dust pad ready. Run the dust pad allover the keyboard and try to get in between all the keys and little cracks. Unless your keyboard has been sitting in an attic for years, you shouldn't pick up too much dust.
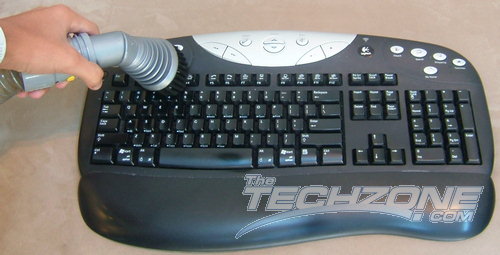
Next, turn the vacuum back on and once again run it over the keyboard. Try your best to get the bristles in all the cracks to loosen up any materials. 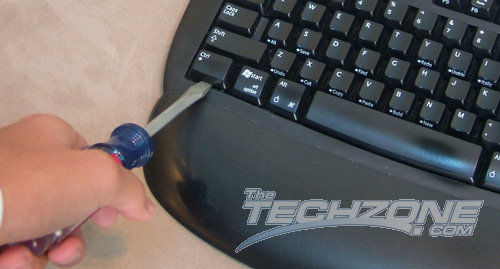
Now for fun part. Take the screwdriver and start on one of the corner keys (I would suggest starting with the CTRL key.) Put the screwdriver's tip underneath the key and turn the screwdriver. The key should pop right off if you have done it correctly. Set the keys in a safe place so that you are not missing one at the end of this guide. I suggest you do not take off the large keys: Shift, Spacebar, Enter and Backspace, unless you know what you're doing. These keys are hard to put back once they are removed because they have a small metal bar on the bottom of them. If you know what you're doing, go right ahead and pop them all off.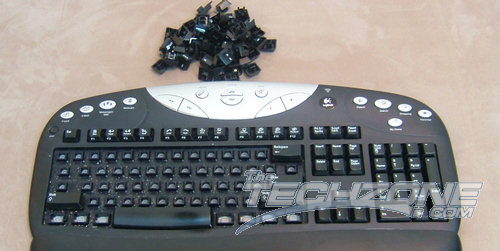
I've just about removed all the main keys, now to start with the F keys and the right side of the keyboard.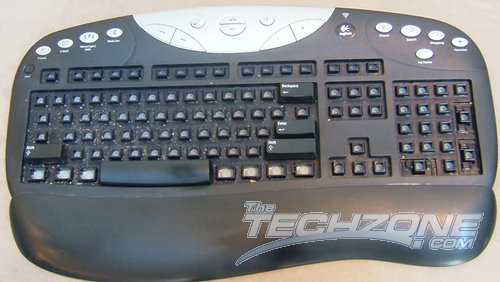
I've removed just about all the keys and there is a complete mess of crumbs, hairs, and dust. I've decided to take off the large keys as well.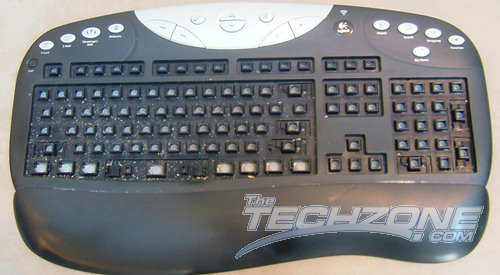
At this point, you should have just about removed all the keys on your keyboard, unless you've decided to keep on the large keys. I'm sure at this point you are pretty amazed at how much dirt was in your keyboard. The last time I cleaned it I found staples, paperclips, and even paper tabs, but that's because I hadn't cleaned it for over a year.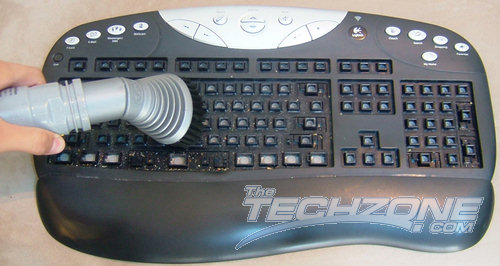
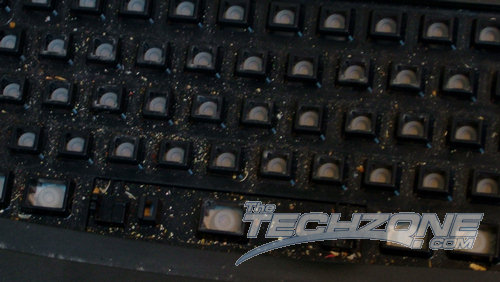
Once again, take the vacuum and suck up everything that you can on the keyboard. You may notice a lot of it is stuck and the vacuum won't suck it up. Once again, I recommend using the attachment that has the bristles on the end. Go back and forth in between the keys and the bristles should loosen up a lot of the material. 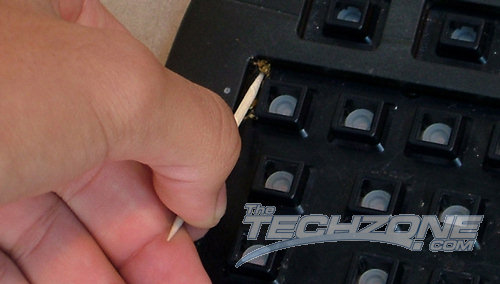
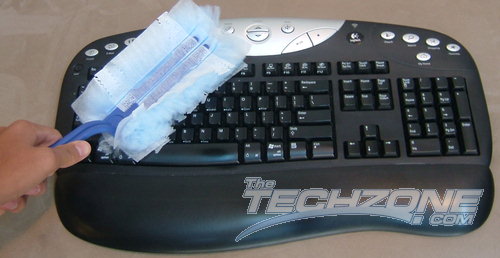
You'll begin to notice that your keyboard is starting to become cleaner. Now take a toothpick and try to get all the gunk that is stuck around the edges. Use a tissue to wipe off the end of the toothpick. You may also want to try using a q-tip. Take one end of the q-tip and dip it in a cup of water. Try to squeeze the end of the q-tip so that it is just damp and not dripping wet. Run the q-tip along the keyboard while applying some force to try and pick everything up. Now flip the q-tip over and use the dry end and run it along the same path, drying up anything that may be a bit wet.
Be careful when using the water. If you get your keyboard all wet, it may not function correctly.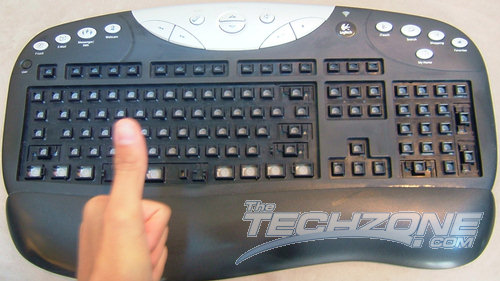
Right about now your keyboard should be looking pretty clean. Make sure you dry off any parts that may still be wet.
f your keys happen to be dirty, you can put them in a cup of water. I've decided to only put a few keys in the water because they were very dirty and I wanted to get alot of the finger oil off them. Swish the water around and try and rub each key to clean it. Once you've done this, remove the keys from the water and dry them. Be sure that they are completely dry before putting them back on the keyboard.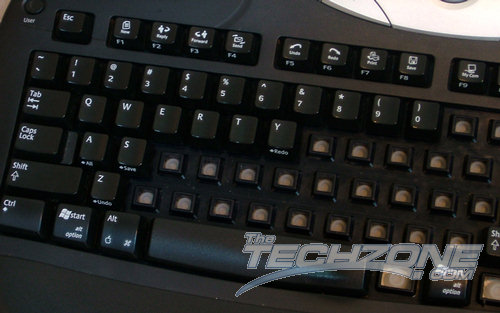
Now this is when your handy photo comes into action. Begin putting all the keys back in their proper position. All you have to do is line the key up with the hole and push down and it should pop right back in.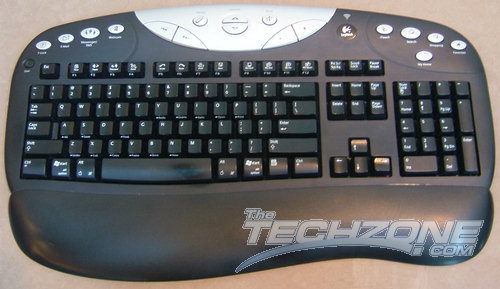
Voila! And there you have it. If you want, you can run the vacuum over it again to suck up any materials that were left behind. If you want to give your keyboard a cleaner look, swipe the surface with a clean cloth and you should have a nice clean keyboard.


 Views : 16627
 Comments : 11
 Rating :
  Last Updated : Aug 8, 2007

