How to create selective color using Photoshop CS2


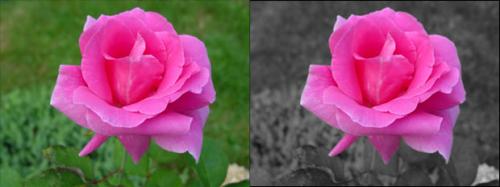
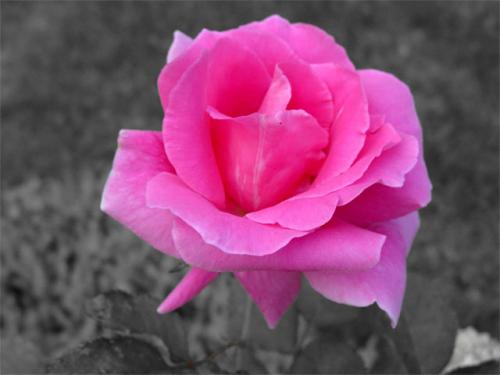
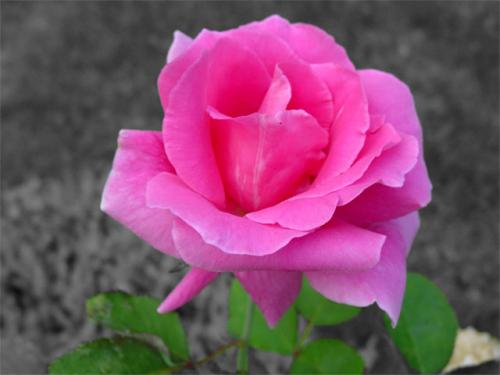
Selective coloring is a special technique used to enhance certain parts of an image. It's most often seen by completely desaturating the background of an image and leaving other elements of the picture completely saturated. While this may create a cool effect, it's a "cliché" of sorts that beginners often over-use. I will show you the basics so you can get started, but I encourage you to be creative with it because you can create a lot of cool subtle effects with adjusting the saturation channels in an image. Before we begin, here's a quick example of what selective coloring can do. This is the image I'll be using throughout the tutorial.
To begin you'll obviously need an image to work with and a copy of Photoshop CS2. So first things first, open up your image and set up your workspace to your liking. If you ever need to reset the pallets to their default locations go up to the menu you and click on Window -> Workspace -> Reset Pallet Locations.
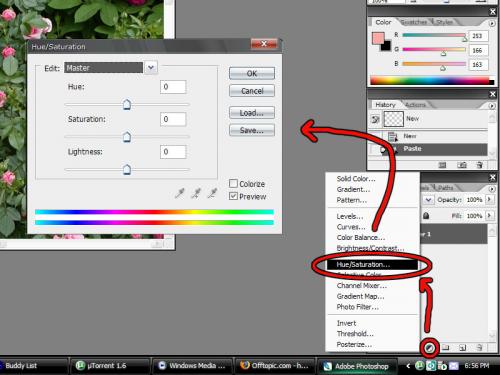
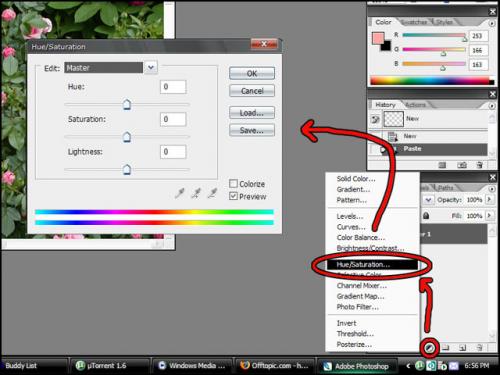
Once you have your image opened up, look toward the bottom right of the screen and click on the "Create New Adjustment Layer", which looks like a little half moon. From there click on Hue/Saturation to open the Hue/Saturation dialogue. See the illustration below.
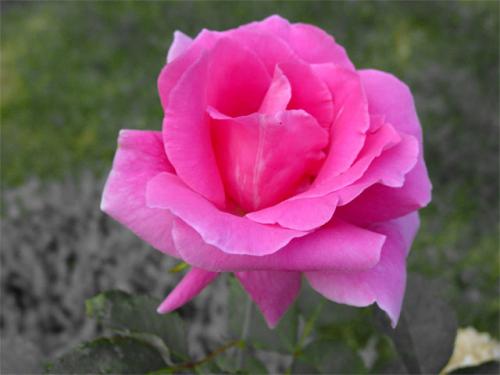
From here you have a couple of options depending on how simple or complex your image is. In this case I'm just removing the green color of the grass and leaves. In the illustration above click on the drop-down menu where it says "Master" and go down to "Green." Once there take the "Saturation" slider and drag it all the way to the left, or just type in -100. This should result in the following image:
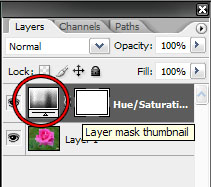
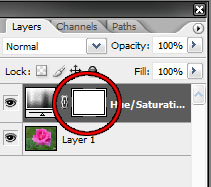
Unfortunately, even though all the grass and leaves looked like they were all green, you'll often find that when experimenting, often times every-day objects that you normally perceive as being one color are made up of several different hues in varying saturations. In this case there's a good amount of yellow hue. Where the drop-down menu says "Green" go ahead and switch to the Yellow channel and drag the saturation slider down to -100. This should clear the rest of this picture. If you ever need to get back to your hue/saturation adjustment player after you close the dialogue, just double click the icon for the hue/saturation layer, as illustrated below.
So now the photo is done...
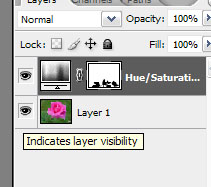
...Or is it? You'll often find that when you edit one color channel, you'll inadvertently desaturate something you didn't mean to because the colors are similar. Luckily we used a masked adjustment layer, so this is an easy fix! Notice next to your Hue/Saturation layer there is a white "box". This is your mask and it works similar to masking tape when you paint a room. You can paint with white and black and varying shades of gray. In our case the black will represent the masking tape. This can be easily remembered using the phrase "White reveals, black conceals."
Just for kicks lets re-saturate the leaves of the rose shown here. We're going to edit the mask layer, so click once on the white "box" next to the hue/saturation layer we've just made. It should have black brackets around it once it's selected. As illustrated below. Also, now is a good time to have your pallet ready with some easy shorcuts. To reset your default colors to black and white, just type the letter "D". Also when masking it's helpful to use the shortcut letter "X" to switch between black and white quickly.
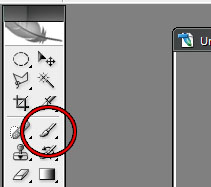
Next select your paint brush tool. If there's a picture of a pencil here click and hold to switch to the brush tool.
Remember what I said earlier? Black conceals and white reveals. Go ahead and start painting your mask. You can adjust your brush size and hardness at the top. After you finish with your masking, your mask layer should look something like this. You really don't have to be exact with this.
And the resulting image. I didn't a wonderfully atrocious job with this, but you get the idea.
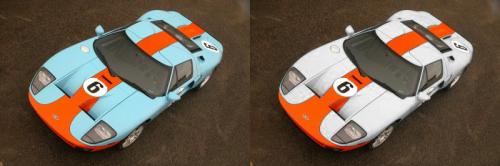
Now just one more tip before we're done. Often times you'll end up with a color that falls into more than one channel in the Hue/Saturation channel mixer. The best thing to do in this case is pick the color that's closest to what you're trying to change. In the following example, select "Blue" where it says "Master"
And from there you can actually click on your image to sample the exact hue you're looking for.In the above example this would have saved you from having to desaturate both the green and the yellow channels (and possibly mess up another part of the picture you might not have to) and done the whole thing in one step. Here I selected the cyan channel and used the eye dropper to sample the exact hue and desaturated that tone by itself (and also lightened it because the grey and orange didn't look good.) Note the Ford logo is still blue and I didn't have to mask it off.
One last note, you don't have to desaturate everything. You can also use this same technique to swap colors quickly and easily. Be creative and experiment!


 Views : 10104
 Comments : 7
 Rating :
  Last Updated : Aug 8, 2007

