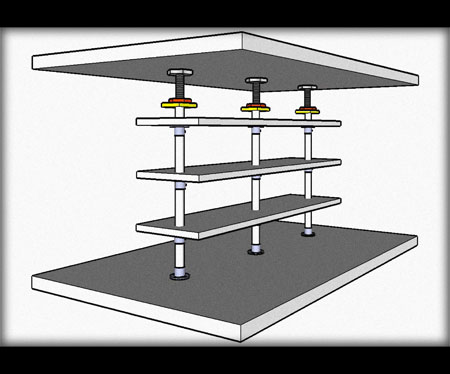
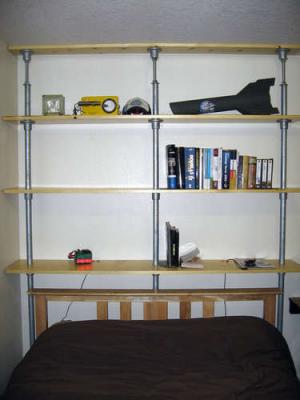
Zero Point Shelf


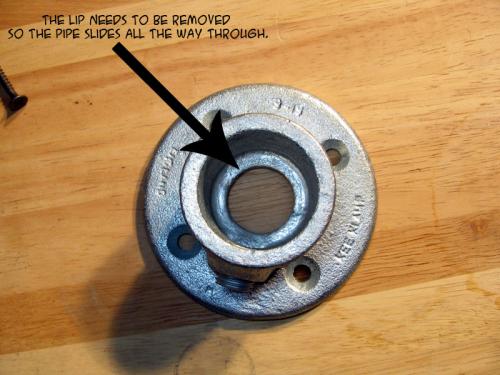
Special Note: In the following steps I describe how I removed the lip from the flanges, if you'd rather not have to do this I've learned that Simplified Building can bore out the fittings for you (additional cost per flange).
Parts -
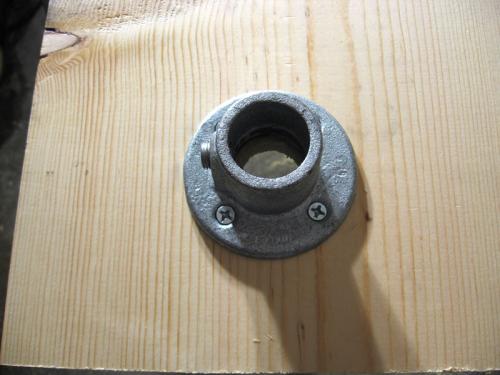
x15 - type 61-6 1" Kee Klamp Flanges | Simplified Building
x3 - 10ft 1" galvanized pipe | Home Depot
x3 - 1x12x8 | shelves | Home Depot
x2 - 1x6x8 | header and footer | Home Depot
x3 - 2ft 3/4" threaded rod | clamp assembly | Home Depot
x6 - 3/4" bolts | clamp assembly | Home Depot
x6 - 3/4" flat washers | clamp assembly | Home Depot
x60 - 3/4" screws | attach flanges to shelves | Home Depot
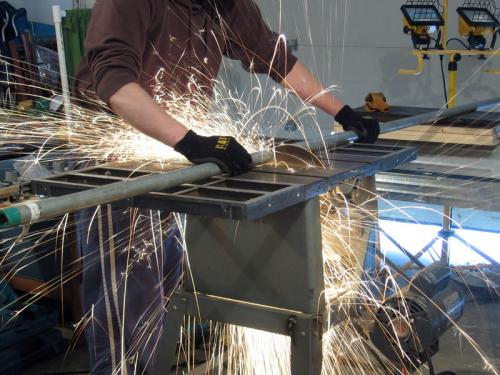
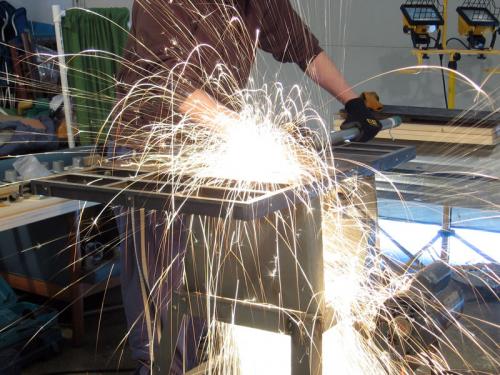
Step 1 - Remove the Flange Lip
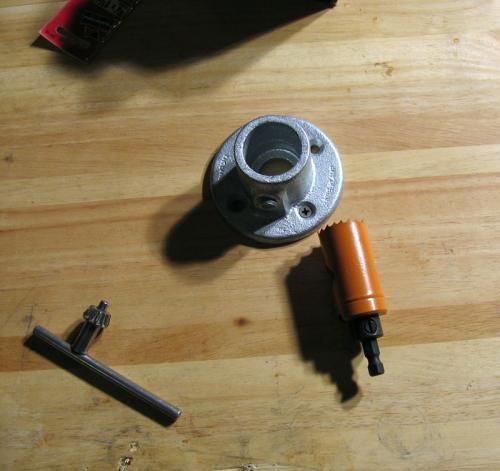
First step is to remove the lip from the 9 flanges that will be used to support the shelves so the pipe slides all the way through. I used a metal hole saw to get the majority of the lip out and then used a grinder to get the remaining.
I forget the exact size of the bit (after the 9 flanges it was useless and thrown away) but it just fit inside the flange.
The flanges were screwed down to the table to keep them secure during drilling
note: the following action likely voids any guarantee or warranty the Kee Klamps have.
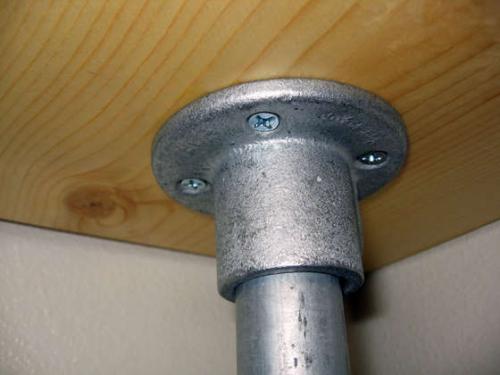
Note: the flange is secured (see screw in pic below) to prevent it from moving during drilling.

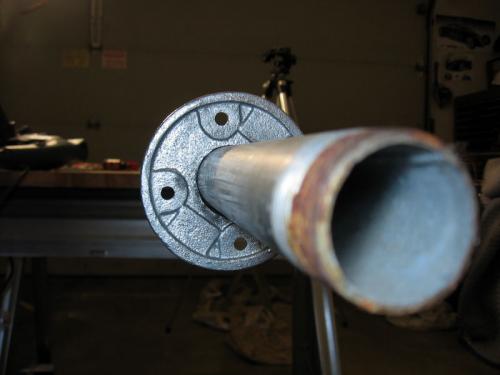
The drill did not remove the lip completly, so a grinder was used to remove the rest.

Eventually:

Fits like a glove:
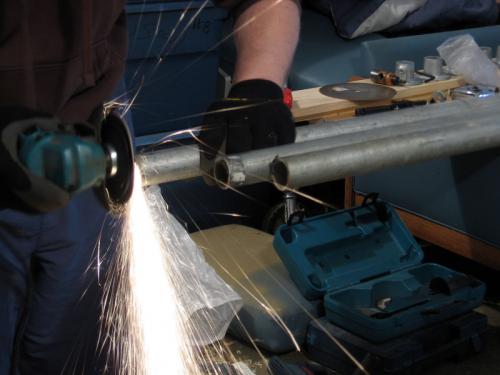
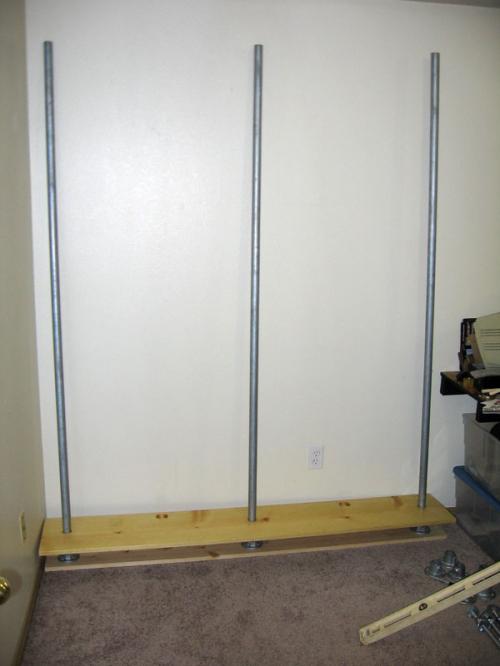
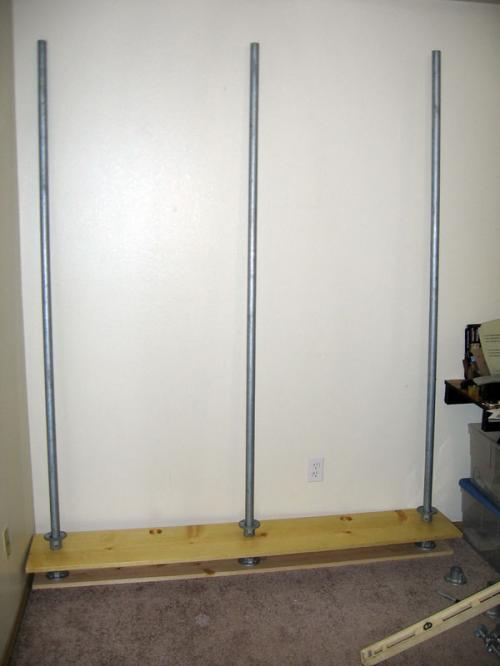
Step 2 - Cut the Pipe
Using a table saw and metal cutting blade I cut the pipe to length.
The length of the pipe depends on how high your ceiling is and how long your threaded rod is, I cut mine about 9" short of the ceiling, with 2' of threaded rod this gives me plenty of playing room.
You don't want to pipe too long or short - too long and it will make adjusting the clamp difficult or impossible, too short and you wouldn't be able to clamp the shelf between the ceiling and the floor.
You want to grind the burs off the ends after cutting:
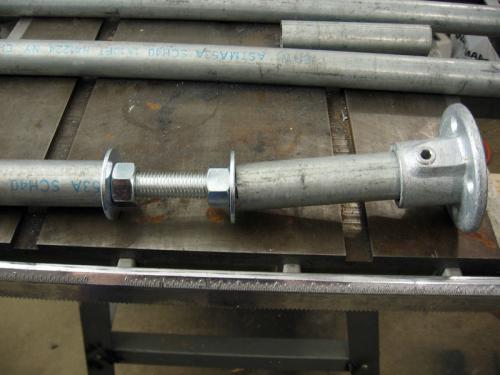
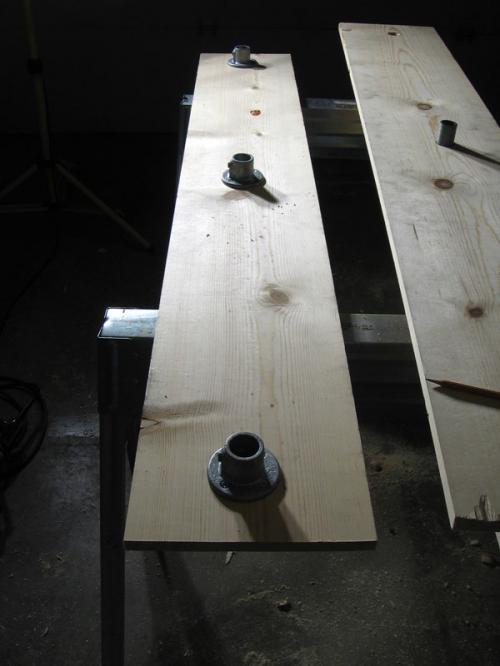
Step 3 - Clamp Assembly
After cutting the pipe I tried out the clamp assembly - the one shown works but I later decided that the smaller pipe (ceiling half) wasn't needed.
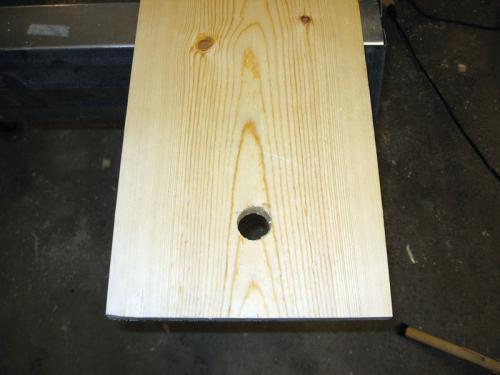
Step 4 - Drill Holes in Shelves
After cutting the boards to length I used an adjustable hole saw and drilled out the holes in the shelves for the pipe to pass through. I eyeballed the size needed, the pipe just fits through the hole which is what I wanted.
I clamped the shelves together and marked where I wanted the holes on the top shelf. Leaving the shelves clamped together and using a standard bit (1/4" I think) I drilled a hole through all the shelves. I then un-clamped the shelves and used the smaller hole as a guide for the hole saw, so the holes ended up in the same place on all three shelves.
Using the hole placement on the shelves as a guide I marked where the flanges needed to be on the header and footer.
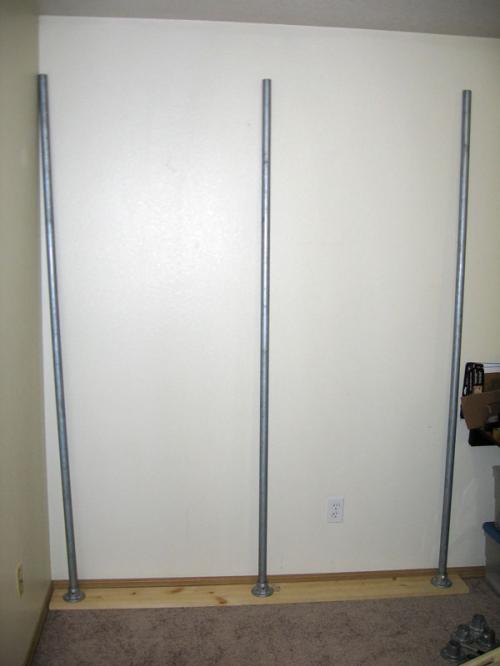
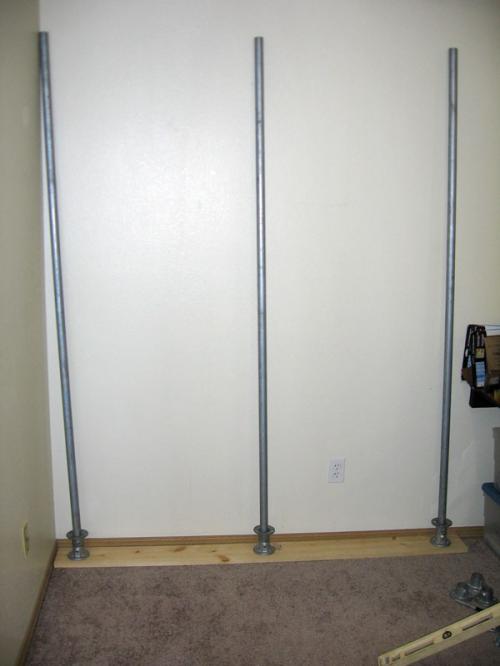
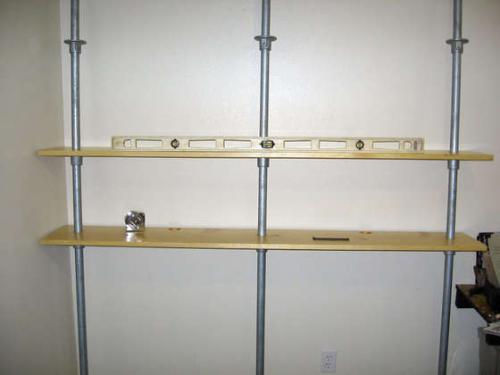
Step 5 - Test Assembly
After all the holes were drilled in the shelves there was nothing left to but test it out.
Step 6 - Assembly Notes
I found the easiest way to assemble the shelf was to insert the pipe into the footer and slide on the flanges and shelves separately adding the header last.
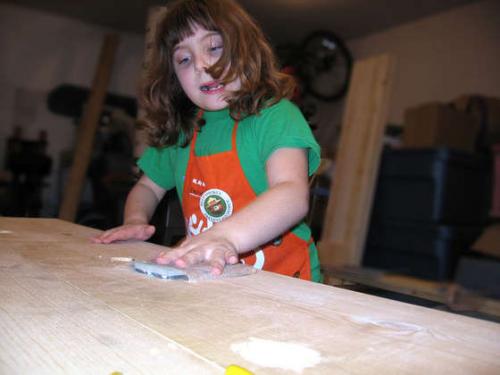
Step 7 - Sanding
Emily, my niece helping to sand the shelves before the application of polyurethane
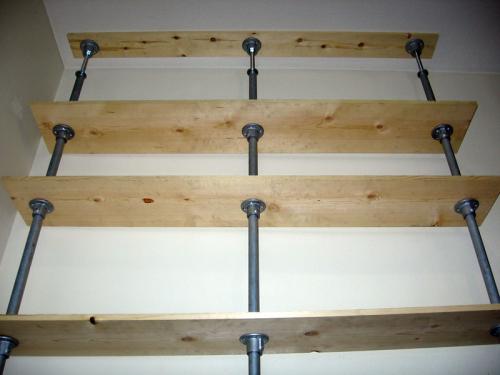
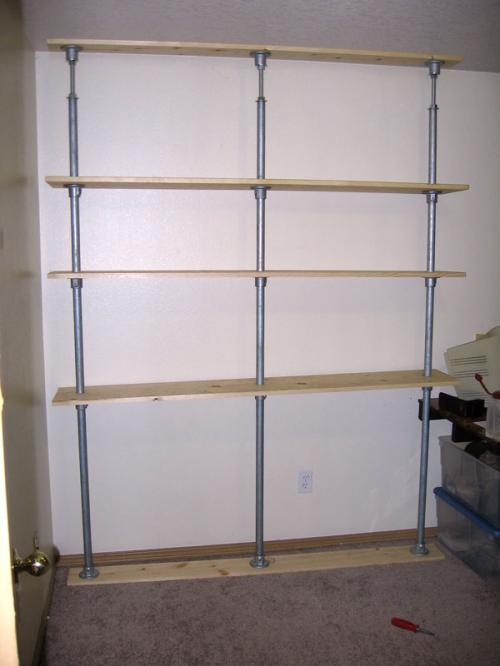
Step 8 - Final Assembly
After the polyurethane it was put back together but with much more attention to being level than in the test assembly.
The assembly followed what was described in step 6:
- Pipe was placed in footer flanges
- Bottom shelf flanges were slid on
- Bottom shelf was put in place, roughly where I wanted it
- Middle shelf flanges were slid on
- Middle shelf was put in place, roughly where I wanted it
- Top shelf flanges were slid on
- Top shelf was put in place, roughly where I wanted it
- Header was put in place, the unit was clamped lightly
- Final adjustments were made to the placement of the header and footer, so the pipes are straight
- Final hight and level adjustments were made to each shelf, make sure the set screws are TIGHT
- Clamped the shelf tighter in place, it's not moving, don't make it too tight
- Flanges were attached to the shelves with 3/4" screws
It might seem like a lot but it's very simple and fast. I emphasize the order because I found it was the easiest way.
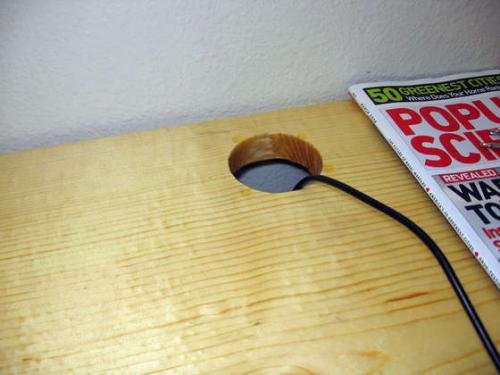
Holes were mde on the bottom shelf for cables to pass through:
Step 10 - Notes
- Galvanized pipe is dirty because of the oil that is on it, you'll want to clean it off after cutting it to length, dish soap and water worked well.
- The Home Depot grade of galvanized pipe may not be "pretty" to some people. You could use aluminum pipe or prettier galvanized pipe but it's a bit spendy and I like the industrial look; fence post is probably to flimsy for this project.
- The table saw and metal cutting blade I used worked but it binds easily, a chop saw would work better.
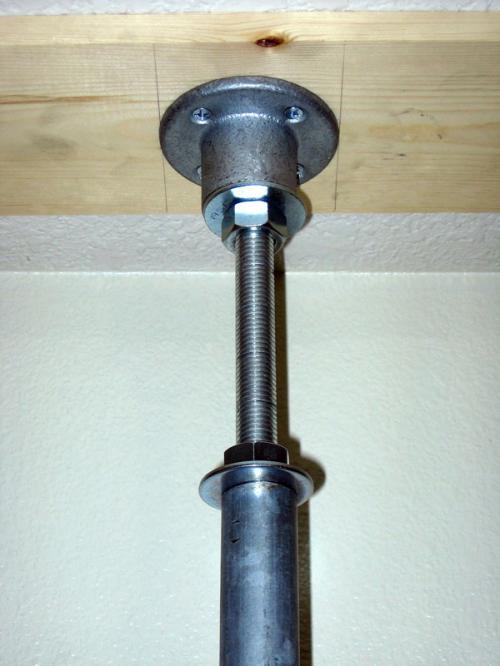
- You want to tighten the clamp mechanism pretty tight, just not too tight as putting a hole through your ceiling would defeat the purpose of this shelf.
- I didn't cut the 2ft threaded rod, about 1-1/2" is inside the top flange the rest is inside the pipe. You want to make sure that there is a decent portion of the rod in the flange and the pipe to alleviate the possibility of it slipping out.


 Views : 1931
 Comments : 0
 Rating :
  Last Updated : Mar 1, 2008


