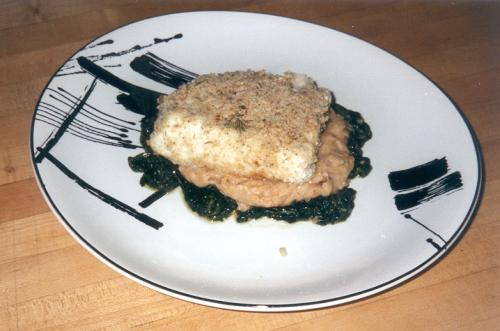
How to bake macadamia encrusted halibut with orange sauce


Here’s a popular fine dining dish that can be served with confidence. Anyone who tries a bite of this will come back for another, whether they eat fish regularly or not. Halibut is wonderfully delicate in flavor, soft and flaky in texture. The encrusted macadamias give a crunchiness in appearance and taste, and work well with the sweet citrus cream drizzled over your creation. Serves 2.

Things you’ll need
- 2 each 6 to 8 oz. portions of Halibut fillet
- ½ cup macadamia nuts, chopped
- 1 whole egg
- 1 cup and 2 tablespoons heavy whipping cream
- 3 tbsp whole unsalted butter
- ¼ cup concentrated orange juice
- ¼ cup of white cooking wine
- salt and white pepper, to taste
- non-stick frying pan
- small heavy bottom sauce pan
- medium size mixing bowl
- medium size ovenware pan
- large, wide sturdy spatula
Procedure Steps
- Preheat the oven to 335 degrees F. Beat the egg with 2 tablespoons of heavy cream in a medium size mixing bowl. Spread the chopped macadamia nuts onto a large dinner plate. Melt 2 tablespoons of butter in a non-stick frying pan over medium heat without letting it burn.
- Pat the fillets dry with a paper towel, then add salt and pepper, to taste. Put each fillet into the bowl with the eggs and cream, covering fillets completely.
- Gently remove one fillet and put it face down onto some of the macadamias. Roll the fillet over onto the plate one time, then carefully pick it up and put it facedown into the hot frying pan.
- Repeat the same procedure for the other remaining fillet as in step 3. Let the macadamias begin to turn golden brown, and then gently pick up the fish and roll it over once in the pan to the other side.
- Remove the halibut completely from the pan when the macadamias are brown on both sides. Place each fillet in the oven pan, and then into the oven. Cook until internal temperature reaches 160 degrees, or about 10 to 15 minutes. Remove from oven and hold warm until ready to serve.
- To make the orange sauce, put the orange juice and the white wine into the sauce pan over a high heat. Bring to a boil. Add the cream, let it all come to a boil again. Then reduce the heat to medium until the sauce thickens, about 5 to 10 minutes.
- When the sauce is about as thick as syrup on a spoon, remove from the heat. Put 1 tablespoon of softened whole butter into the sauce pan and gently stir into the orange cream.
- When ready to serve, spoon some of the sauce onto the bottom of the service plate.
- Then put the macadamia encrusted halibut onto the sauce. Drizzle a little bit more of the orange cream sauce over the top. Serve immediately.
Tips
- There isn’t enough that can be said about the difference in quality between fresh and frozen fish. But fresh halibut is only available seasonally, and so must be purchased frozen during most times of the year. Fortunately, halibut is one of the catches that freezes better that others.
- If your fillets aren’t already prepared when you buy them, be sure to remove the skin and any bones.
- Be sure to use a good sized spatula to take the encrusted halibut out of the pan and to put into the oven.
- Lift the fillet a little bit in the pan to watch and make sure the nuts don’t burn.
- Immediately remove the fillets from the heat if they turn too dark.
- Serve with steamed white rice or mashed potatoes. Garnish with a sprig of mint or chopped cilantro sprinkled over the top.
Warnings
- The trickiest part of this recipe is not burning the macadamia nuts, first in the frying pan and then in the oven. When putting the fish into the pan, first be sure the fire isn’t so hot that the butter starts to burn. To keep nuts from burning in the oven, lightly cover the fillet with aluminum foil.
- Halibut, like other fresh or defrosted seafood, is highly perishable. The shelf life is about 72 hours in the refrigerator and should be cooked or frozen after then. Keep it covered with plastic and a little bit of ice on top when storing it before cooking.
What did you think of this tutorial?


0 CommentsAdd a Comment

 Views : 952
 Comments : 0
 Rating : None
 Last Updated : Feb 29, 2008


