How To Make a Ribbon Quilted Clutch Bag


Materials
To make this ribbon quilted clutch bag you will need a 10" by 15" rectangle each of top fabric, wadding and lining fabric, buttons or beads for decoration, a clear stud fastener and about 100" of ribbon 1/4" wide.
Making the bag
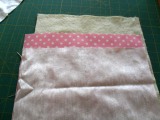
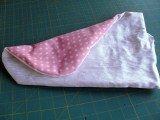
Lay the wadding on the table, smooth gently and lay the lining fabric on top with right side up. Smooth gently and lay the top fabric on top with right side down. In the photo, the pink fabric is the lining and the white silk is the top fabric for the clutch.
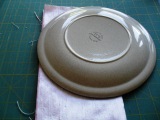
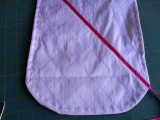
Fold the 3 layers in half along the long edge so that your rectangle is 5" by 15". Mark a curve across the top corner (not the corner on the fold) using a plate or something similar and cut along the marked curve.
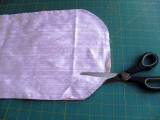
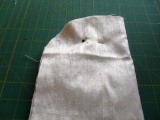
Working at the short straight edge opposite the curve, begin sewing about 3" from the corner and then continue sewing all round the rectangle until you get back to the short straight edge. Stop sewing about 3" from the top left corner so that you have a gap of about 4" with no sewing across that top edge. This is so that you can turn the bag right side out.
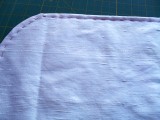
Snip towards the seam around the curved edge. This will help the bag flap to lie flat. Turn the bag right side out through the gap. Turn under a small seam along the gap and slipstitch to close the gap.
Ribbon Quilting
Baste all round the edge so that the layers don't slip against each other.
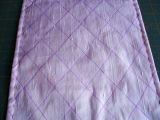
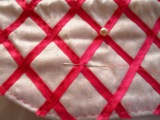
Using a fabric marking pen and ruler, draw a line from one diagonal to the other and then 1.1/2" intervals either side of the first line. Repeat with lines along the other diagonal to make a cross hatch pattern.
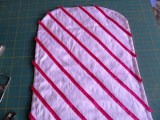
Place the ribbon so that the end just overlaps the corner of the bag at one end of the first diagonal. Using a fairly wide and long stitch, zigzag the ribbon to the bag along the line.
Snip the end of the ribbon just beyond the end of the bag and begin again on the lines to either side of the first line. Always sew in the same direction to avoid the fabric rumpling up.
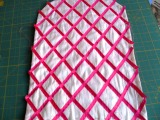

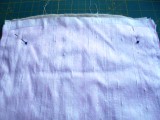
Continue sewing ribbon along all the lines along one diagonal and then repeat the process with the lines on the other diagonal. The right hand photo above shows the cross hatching on the lining fabric.
Completing the clutch bag
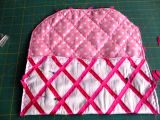
Fold the bottom of the bag up about 4.1/2" and pin in place. Still using zigzag and the same colour thread, stitch as near the edge as you can up one side, round the curve and back down the other side. Trim the ends of the ribbons to the zigzag line to avoid fraying.

The points where the ribbons cross each is an obvious place to put any embellishments. I used 4 pearls to make a diamond shape on the front of the clutch bag. Now just sew on a clear stud fastener on the front of the bag and on the underside of the flap and that's your ribbon quilted clutch bag ready for it's night out.


 Views : 897
 Comments : 0
 Rating : None
 Last Updated : Jan 3, 2012


