Making a Wine Glass rack


Want to build a nice rack display to hang wine glasses, martini glasses, or even margarita glasses, but are short on cash? This is the plan for you! I'm a college student, and recently my roommate and I decided that we would build a bar in our house. This is how we built or wine/martini glass rack.
1. LOCATION LOCATION LOCATION!
First thing that must be done is to find a suitable place for such a glass rack. Usually this will be any sort of shelf of some sort, that has enough clearance room for the hanging glass, and ideally for rocks glass underneath that also. The shelf should also be deep enough to hold at least 2 glasses per row. This is easy enough to see by simply placing the bottom of the glasses on the tops of the shelves and eyeing it. Once you've decided that your location is good, it's time to get to work!
2. MATERIALS!
So now that we have our location, we need the necessary equipment to put this nice glass rack together. As far as tools go, it's best to have some sort of wood cutting device, preferrably a circular saw of some sorts. Also a must is a powerdrill, with both a screwdriver bit for the screws and also a good set of drill bits. These will be necessary for making the holes in the wood that we will cut later. Sandpaper would also be a good option since sometimes that wood pieces may splinter during the cutting process.
Now for the actual materials that will make the glass rack:
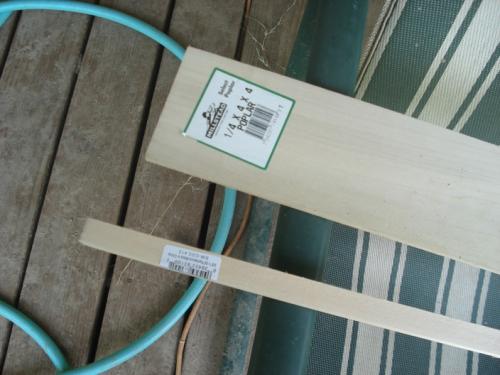
Poplar wood (1/4x4-4 is what I used)
5/8x36 square hardwood sticks
Wood screws (they should be long enough to go through both the poplar wood and the square sticks, and into (but not through) your shelf). Make sure they're not too wide, as they will split the wooden sticks.
As far as the quantities for these go, it really is dependent on the length of your shelf, how long you want your glass racks, and how deep the shelf is. Figure all those out and determine how much you'll need, and then get a little extra! Things happen. Keep in mind that for each "row" of the glass rack you will use one piece of square hardwood, 1 piece of poplar wood, and 2 wood screws.
3. MAKE IT, DON'T BREAK IT
First thing is first. Measure how deep your shelf is, and then mark of sections of the poplar wood and square hardwood stick. Mark off as many sections as you can per piece, usually you'll have about 4 inches or so leftover from each piece, you can go ahead and throw that away. Once you have all of your pieces cut, you'll want to get your power drill and put on a drill bit that is slightly smaller than your screws on it. Now, take your poplar wood and mark to points in the center on either end of the wood, and this will be the line where the square hardwood stick will line up. Make sure you go about a half inch to a full inch inside from the edge of the wood. When you have your points marked, use your drill to make holes on each point. Line up your hardwood stick underneath the poplar wood (centered of course) and stick the point of pencil through the poplar to mark the hardwood beneath it. This will make sure your screw holes are properly aligned. Drill out the holes on your hardwood stick also. Now change to the screwdriver bit on your drill, get your screw and attach those to the shelf! The order should be poplar wood, hardwood stick, shelf. The hardwood acts as a spacer. If you've done everything correctly, you should have your first row on your rack! Repeat until all desired rack space is created.
NOTE: Always place the first one all the way to the side of the shelf, and when you start thinking about where to place the next one, have one of your wine or martini glasses handy, and place that on the shelf to figure out how wide it needs to be to hold your particular glass. All glasses are different so make sure you do this! It would definently not be good to finish and then realize none of your glasses fit!
4. ENHANCE AND ENJOY!
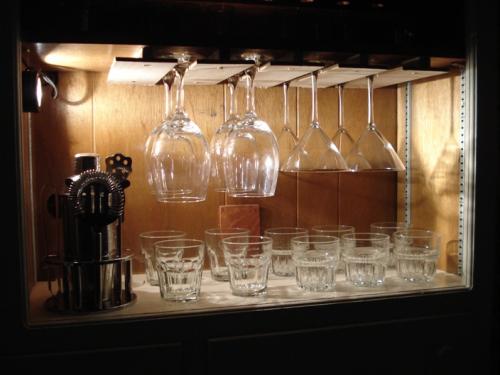
So now that your rack is built, it's time to fill it with glasses! I personally made enough room for 4 martini glasses, and 4 wine glasses, which is a pretty good amount of glassware but you could always use more! Also, I installed some lighting on the shelves where the glasses are in order to give it a much nicer, professional appearance. Now that you've got it all set up, make a drink and admire your handy work!
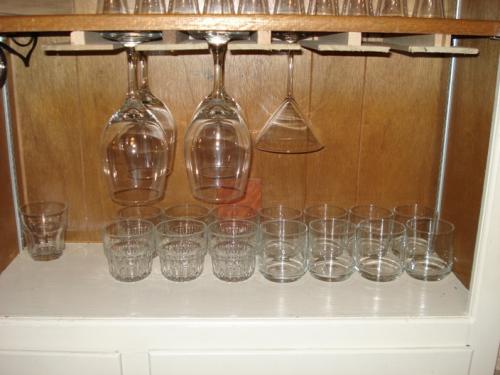
NOTE: Unlike you, I did this without any writeup and rather hastily! I didn't use the sandpaper (like I have recommended to you) and as you may see the ends of some of the pieces of wood have some splitering. Also, I screwed one of the hardwood sticks too tightly and it cracked the wood (the far right piece), so that should be avoided! Also, if you have a wood cutting station, or would like to get it done at home depot, that would be great because you would get perfect cuts! My "woodshop" consists of a big white shelf-thing and then I hold the wood down with 2 35 lb. weights on my porch. Needless to say, the cuts weren't the straightest ever, but it all worked out! How perfect you make it is up to you! Good luck.
Joe


 Views : 11395
 Comments : 11
 Rating :
  Last Updated : Aug 9, 2007


