Photoshop tutorial - Quick and Easy Vector Looking Images
This tutorial will teach you how to make retro looking vector images in Photoshop.
(If you have a different version of Photoshop, some of the menu items might be different)
Experience needed: Basic understanding of Photoshop CS2
First off, this tutorial works best with portraits of people. However, you can experiment with other images. After all, art is all about experimentation. Here is an example of the final result of this tutorial:
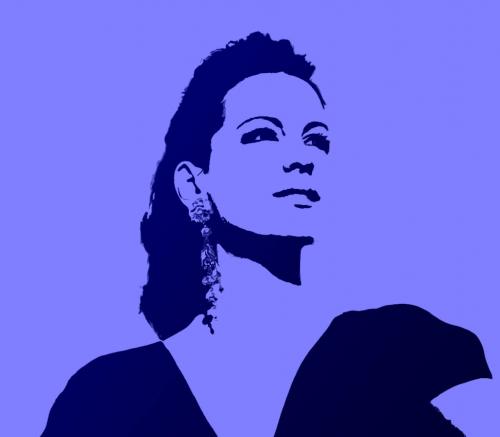
You can use any image you want. If you're looking for images to try out with this tutorial, I suggest going to stock.xchng here: http://www.sxc.hu/. They have a bunch of stock photos with easy to remove plain backgrounds.
However, for the purposes of this tutorial, I'm going to start off with this image of Kate Beckinsale.

You want the background to be white. So use the erase tool and erase the background until you have a white background.
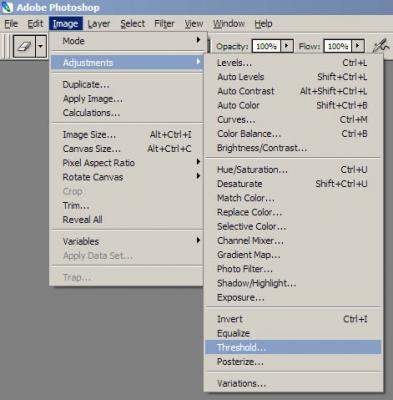
Next, the first step is to prepare the image to be rendered. Go to the Threshold menu under Image.
The Threshold screen will pop up. Use the slider to adjust the image. You'll see that as you move the slider left, the less detail there is until the image disappears. And as you move the slider to the right, the image gets darker. You want strong lines without too much "noise". Each image is different so choose a value that's right for your image.
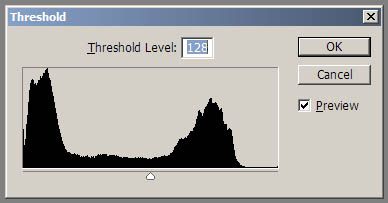
This is the result after applying the Threshold:

The next step is smooth the image out some. We'll use Diffuse under Filter.
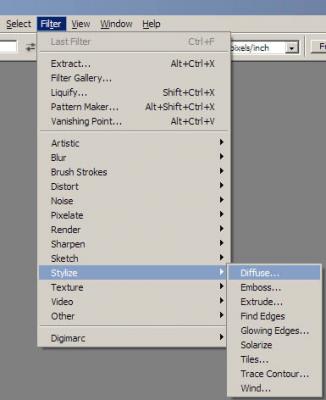
When the Diffuse menu screen pops up, use "Anisotropic" and then click OK.
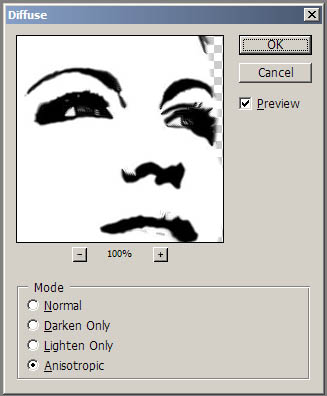
This is the result:
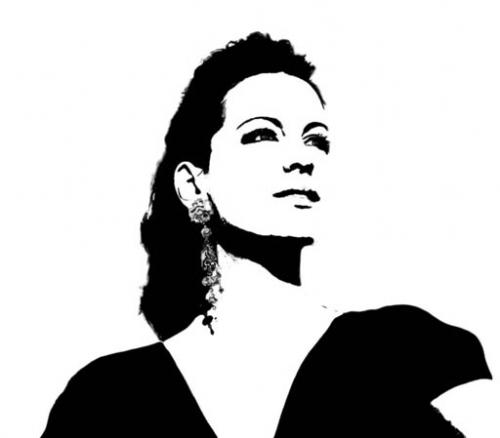
As you can see, the outlines are stronger and the image is smoother. From here, you can start erasing some minor imperfections and little blips in the image to clean it up a bit.
One more step to further smooth out the image. Use Unsharpen Mask... under Filter.
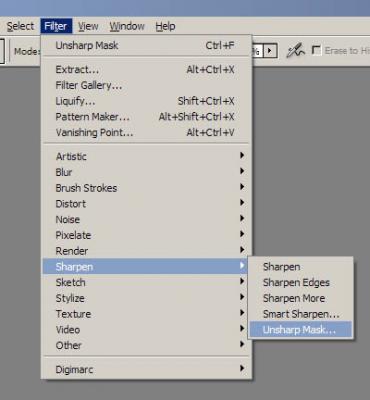
When the Unsharpen Mask menu pops up, use these settings:
Amount: 300%
Radius: 50.0 pixels
Threshold: 150 levels
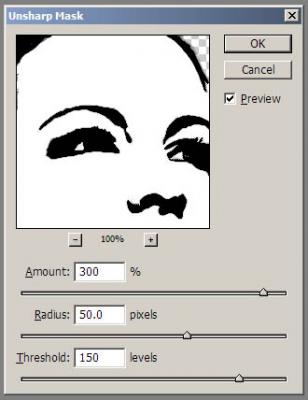
Once you click OK, the result should be that image is even smoother and the outlines are now very strong. You can continue to erase little imperfections if you wish. The result should look like this:

Create a new layer and place it under your rendered image. Make sure it's selected for the next step.
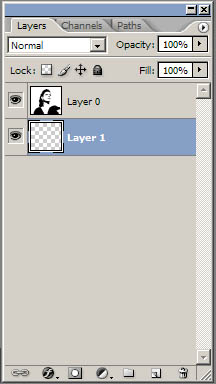
It's now time to add some color to your image. You can experiment with what colors you want to use, but the background color should be the same tone but a slightly darker color than the foreground color. Select the Gradient tool.
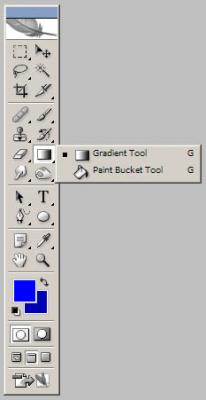
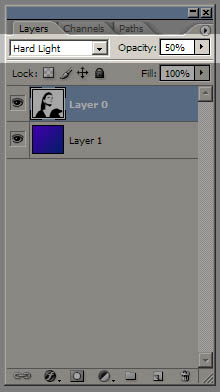
Make sure you're working on the bottom empty layer and make a gradient starting from the top left of the image to the bottom right of the image. You won't see any difference until you apply the following settings. For the top layer, use Hard Light and then play around with the Opacity settings. The higher the value of Opacity, the less color there is and the lower the value of Opacity, the more color there is. Adjust to your liking.
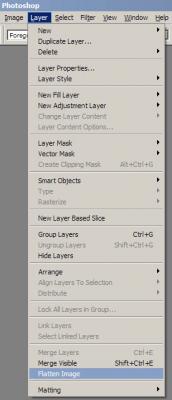
You're almost done. Flatten your image.
And your final image should look something like this:

You can find some cool vector brushes over at http://www.deviantart.com. More specifically, the Photoshop Brushes section.
What did you think of this tutorial?
+ 50
6 CommentsAdd a Comment
Thanks for the tutorial I have been trying to learn this on my own before now, but all effort prove abortive. now I can do it all thanks to you.
This tutorial is awesome, thank you! What you can do in addition to this is:
After applying the original threshold, merge the threshold layer with the original layer. Apply a threshold layer to that, select the original merged layer, then go to Filter>Blur>Gaussian Blur. Play with the amount of blur and the threshold level to change the level of detail. Then use this awesome tutorial to get rid of the jagged pixels.
More of an Andy Warholish look than vector, but I like it and will use the info to play with some of my photos. Thanks much.
SKEEEN sooo crap wre da colour :S
daaah nt even a propa vector juz a cheat lazyy way :S
Title Says "Quick and Easy Vector Looking Images"
it means quick right? Just like you too lazy to complete and spell the words correctly :P
Nice tutorial.
Thanks


