The Noobs Guide to Posting on an Internet Forum


Website Chat Forum User Guide
I decided to created a one stop shop for everything related to posting on internet forums, from a user standpoint. This should help eliminate your confusion of these sites, or help people who are new to computers get around easier.
NOTE: This Tutorial is based on one website (KTM Talk) and much of the information revolves around it's posting procedures, so, if the steps are a tad different between this and your forum, I appologize. But, the general procedures are usually the same from a PHP board to a VBulletin board.
Enjoy!
Table of Contents
Chapter One: Welcome to the Forums!
1.1 New Members Forum, go introduce yourself!
1.2 New Members Posting Priviledges
1.3 New Members, Don't be shy!
1.4 New & Old Member, Become a team member!
1.5 Glossary of forum slang/terms/acronyms etc
Chapter Two: Site Navigation
2.1 Bookmark this site!
2.2 Bookmark your favorite Forum!
2.3 My Assistant
2.4 My Controls
2.5 Avatars (Not Aviator! lol)
2.6 Signatures
Chapter Three: Searching is Your Friend!
3.1 Searching for general forum info
3.2 Searching for specific forum info
3.3 Searching for specific existing threads/posts
3.4 Searching for member names
3.5 Searching for members in your area
Chapter Four: The art of Quoting!
4.1 Basic quoting procedures
4.2 Quoting a partial post
4.3 Quoting in multiple format (answer a post piece by piece)
4.4 Friendly quoting, don't be a noob!
Chapter Five: Posting Pictures!
5.1 RESIZE that pic first!!!!
5.2 Uploading from your computer
5.3 Hotlinking (Posting pics from a different webiste)
Chapter Six: Other Basic Posting Procedures
6.1 Linking
6.2 Bold, Itallics, Underlining, Font, Size, Color etc...
6.3 How do you edit your post after you ve posted it???
6.4 Subscribing to topics or forums, or download a topic?
Chapter Seven: Miscellaneous Tips & Tricks
7.1 Screen Capture
7.2 See what your buddies are doing on ktmtalk
7.3 Enjoy!
--------------------------------------------------------------------------
--------------------------------------------------------------------------
Chapter One: Welcome to the Forums!
Well, somehow you managed to stumble across a website that offers a forum. I am assuming this is a website you frequent often, and would like to participate in the discussion and/or find information in some way or form. Well, you need to introduce yourself first!
1.1 New Members Forum, go introduce yourself!
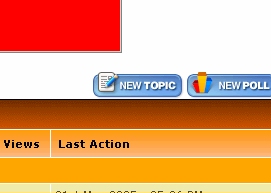
Go to the main page of your selected forum and find the introduction forum. Often called the "Newbie" forum, the "Hazing" forum or the "Initiation" forum. It's different for every website. At any rate, find your newbie introduction forum and open it up (click on it).

Click "New Topic"
Fill out the text boxes as shown, to suit your personal message to be displayed
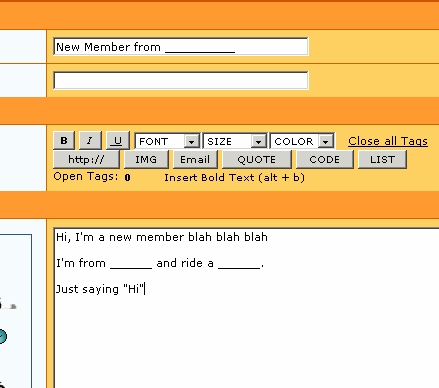
Click "Post New Topic" or "Add New" depending on the forum you are visiting.

And there you have it! You're famous!
1.2 New Members Posting Priviledges
New members are limited on most websites. In some cases, you will not have access to send private messages or email other members. You will also not be able to post in the classified sections, or be able to access the complete list of various forums. Many have hidden forums for "trustworthy" members, some don't.
The reason for this, is to keep the internet spammers at bay. This is how your site administrator keeps their site clean and running smoothly for their members. Don't take offense to it, they are doing you a favor by making it a better experience on their site.
To get access to all of this is simple, depending on which site you are on... a few options are:
1) Some sites make you hit a "milestone" post count number. Which means you must post 10 or more posts, 50 or more, even 100 or more. They must be legit posts, and not just quick posts to get your post count up.
2) Some sites require that you pay to be a member to get certian features turned on. Such as avatars, signatures and private messages.
Look around, there are thousands of threads to post on. You should have no problem getting X # of posts, and hey, you might have some fun doing it!
1.3 New Members, Don't be shy!
Depending on the site you're on, there are hundreds of thousands of members, so you're not the only one to sign up and just "look around". But don't be afraid to post up. Who knows, you might make some lifelong friends, riding buddies, or hook ups. There is no reason to be a shy person on these sites.
1.4 New & Old Member, Become a member!
Being a paid member of a select forum, not only allows you to access other priviledges, but also helps the owner/administrator keep the site running smooth. Your "donation" will help pay for bandwidth, server upgrades and site upgrades.
How to join [on KTM Talk, your site may be different]:
On the top of every page of KTM Talk, you'll see this:

It's located here:

Simply follow your steps to becoming a new member and site supporter, and reap the benefits!
1.5 Glossary of forum slang/terms/acronyms etc
Some basic terms you will hear around the forums.
Forum/Category/Section: These are names to pertain to the main heading listed here as "KTM talk Information" You can click it to show only the subforums underneath it.

Subforum: Subforums are the forums under the main category listings as shown above as "How Do I?" "FAQs, Forum Rules, Terms Used etc"
Thread: A thread is a message within a forum. Not the reply, but the message with all the replies together is one thread. As shown below as "Email Account" "How did ktmtalk get started" etc... The bold ones are "pinned" or "stickies" which means they are important topics that will stay on the top of the subforum page until they are "unpinned" or "unstuck"

Reply: A message a member posted under a thread, to "reply" to the topic. Click on the thread you want to view, and you will find the replies. As shown here.

490440 started the thread, and Nick 753 and all underneath him are "replies".
Av/Avatar: Sometimes called the "Aviator" lol, the avatar is the little picture by your name, on every post you make. It is NOT an aviator!!! lol
Sig/Signature: A Sig, or Signature, is the text that automatically goes at the bottom of every post.
Here is a list of the most popular internet acronyms on the internet, like "lol".
IMO - in my opinion
IMHO - in my humble opinion
IMNSHO - in my not so humble opinion
BTW - by the way
AFAIK - as far as I know
IIRC - if I recall correctly
LOL - laugh(ing) out loud
LMAO - laughing my a.. off
ROFLMAO - rolling on floor laughing my a.. off
TTYL - talk to you later
L8R - later; see ya later
TTFN - ta-ta for now
HTH - hope that helps
WRT - with regards to
FWIW - For what it's worth
There are thousands of these, if you find one you want defined, just go to Google, and search "Internet Acronyms"
Chapter Two: Site Navigation
Here are some tips to help you come back with ease, and get around the site without getting confused or overwhelmed.
2.1 Bookmark this site!
Bookmarking is a term used when saving a webpage to your favorites. It is easy, and there are a few ways to do it.
The first way is to go to the homepage, and hold down Ctrl and then press D (while holding down Ctrl). This will add it to your favorites.
Another way to do it is to right click on the page you want in your favorites, and select "Add to favorites"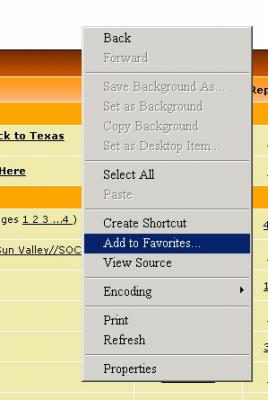
2.2 Bookmark your favorite Forum!
You can do this on any forum. If you like to go straight to a certain forum everytime you visit, go to that forum, and bookmark it. You can also rename your favorites. Just right click on it and hit "rename". Type whatever you want. As you can see here, I have the KTM mini discussion in my favorites, because that is the forum I view first everytime I visit the site: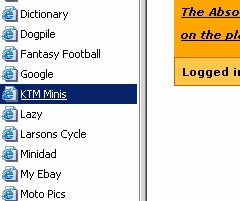
If you can't see your favorites on your screen, click "Favorites" at the top of your screen: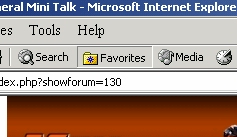
If that does not appear at the top of your screen, you need that toolbar active, you can do this here: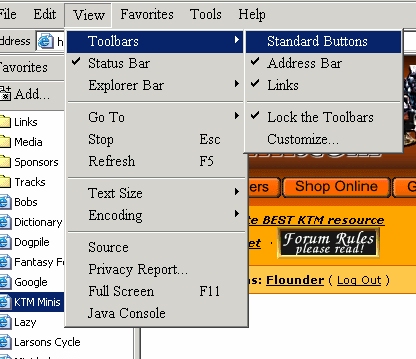
This may vary with different versions of Windows. I am running Windows 2000
2.3 My Assistant or UserCP
My assistant is a helpful tool that some sites offer. It is mainly used to find your old posts, so you can quickly get to them without sifting through a pile of posts on top of them. It is also used to find out the user post count rankings
It can be found here: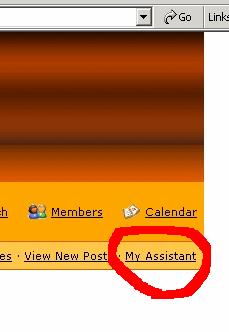
When you click on it, this box pops up: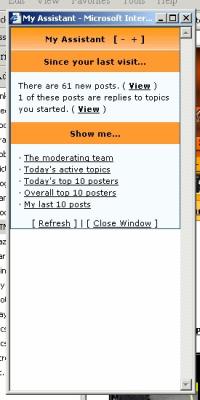
It gives you plenty of useful info in there.
It will tell you the activity since your last visit.
You can view the moderating team.
The active topics of the day.
The top ten posters of the day.
The top ten overall posters.
And finally, the most useful one, your last ten posts .
That last feature is nice because you can jump back in where you left off without spending the time to search for the post.
If you would like to view more than 10 of your posts, click on your name anywhere on the page (in your posts, on the bottom of the screen etc) it will take you to your profile. C
Click "Find all posts by this member" right under your name.
Like this: It's right under "Flounder"
You can do that with anyone s profile, not just yours.
2.4 My Controls
The "My Controls" Link is right in the same area as the "My Assistant" link. Click this to edit your personal profile.
It is all pretty self explanatory, but if you have any questions, or think I need to add anything here, let me know 
This is also where you add your avatar, signature or edit your email address.
2.5 Avatars (Not Aviator! lol)
Avatars are easy to use.
You have three methods of installing avatars.
First option is selecting one from the Site's Avatar Galleries
Second is to "link" to one from an off-site location.
Third is to upload one from your computer.
Okay, if you want to use one from the Site's Avatar Galleries, then you've chosen to do it "the easy way"  Just click "My Controls", then click "Edit Avatar Settings"
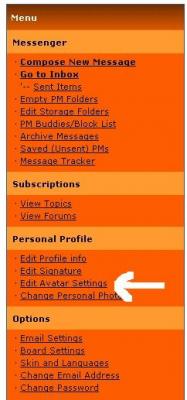
There are 4 galleries to choose from. Look at them all and find one you want to use.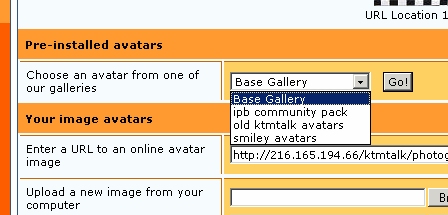
Follow the simple steps and there you have it. You look professional now 
The next option is to link to one. This option is used so you can upload your avatar in the photo gallery then put the address in here: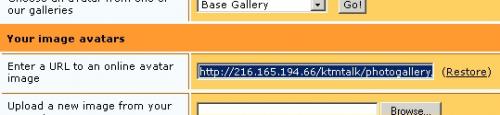
If you need help creating/resizing/uploading your avatar, refer to the "Posting Pictures" chapter of this guide. Your avatar must be under 100 x 100 pixels.
The last option, is the best. Uploading from your computer. This makes it easier than ever.
Simply create your own avatar from a picture, resize it, and upload.
Here's what to do:
OPEN MSPAINT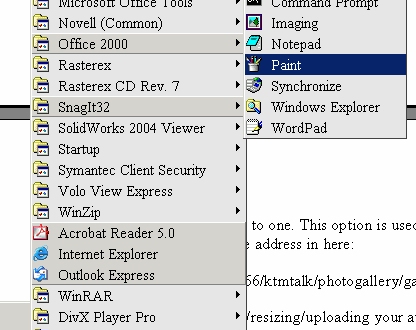
FILE -> OPEN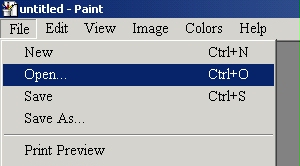
SWITCH THE FILE EXTENSION TO .jpg (jpeg)
(do not use Bitmap (.bmp) files for anything on this site! They won't work!)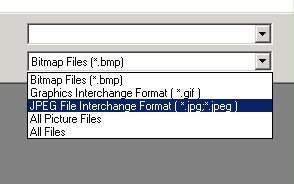
FIND YOUR PICTURE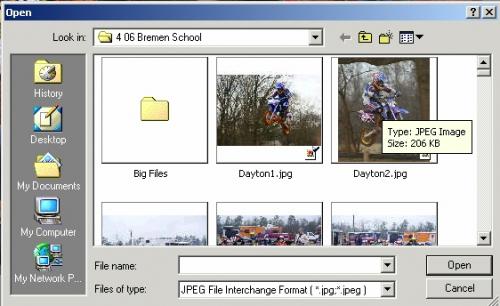
Select "Open"
CROP FOR YOUR AV, IT'LL LOOK BETTER!
Click the "Select" button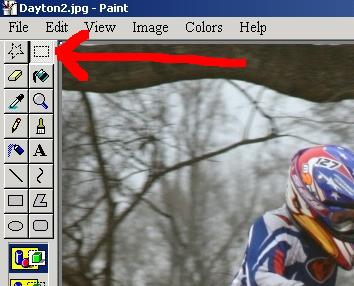
Left-click and drag (holding down the button) a box around your desired portion of the pic. (You ll see a black & white dashed line as your avatar border)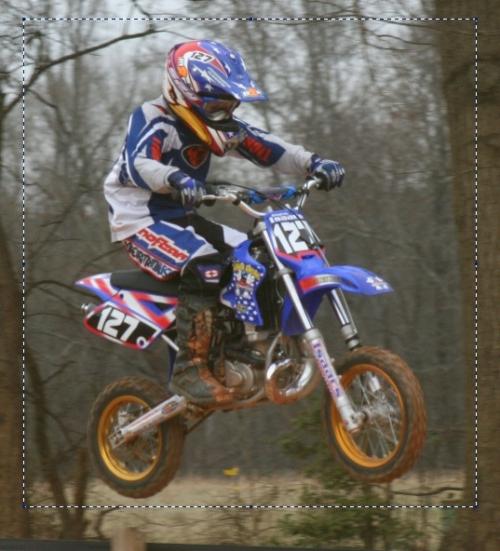
Copy the selected area by right clicking inside of it, and selecting "Copy"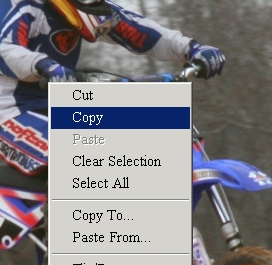
Open a new document now, DO NOT SAVE YET!!!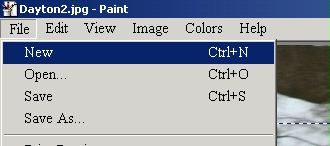
Right Click in the white area, and select Paste 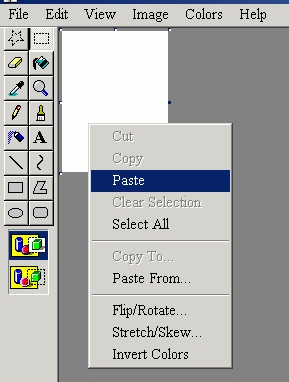
A warning might come up, just click "YES"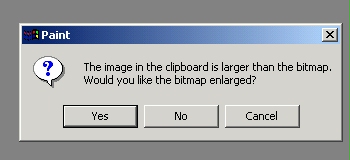
Your Future Avatar is now on it s own page, it might be a good idea to save it now.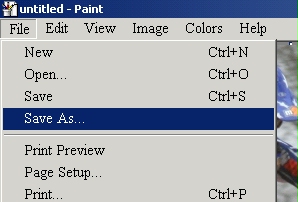
Give it whatever name you can remember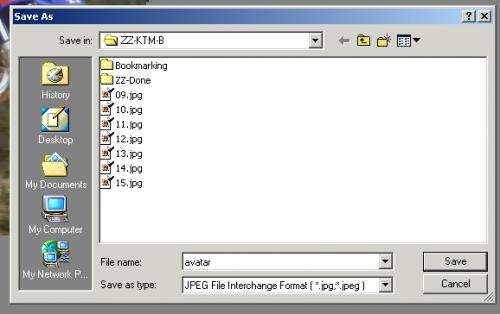
RESIZE THAT AV!!!
How big is it now? Click "Image" then "Attributes"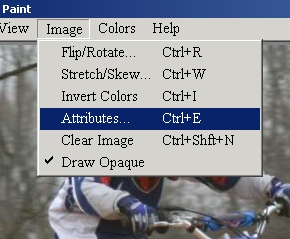
Now, the size you want it at is a max of 100 x 100 pixels.
So, what you will have to do here is take the bigger number, and find out what percentage you will need to scale it down.
My bigger number is 547.
So, I will take 100 devided by 547, and I get 18.28%. Round down always. So, I need to scale my avatar down to 18% of it s original size to fit the 100 x 100 pixel guidelines.
To scale it, DON'T CHANGE THE ATTRIBUTES. It won't work.
You need to Stretch/Skew it, under the Image menu: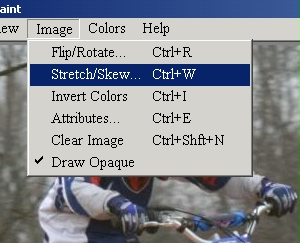
Under the "Stretch" box, change the horizontal and vertical to your percentage to be scaled down to. Mine was 18%: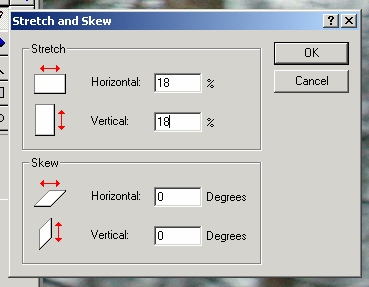
Select OK and you should have your avatar ready to go 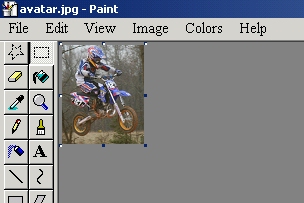
Save this new resized avatar over your other one by doing a "quick save":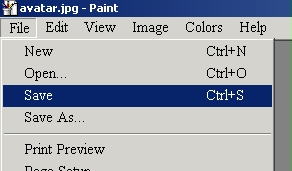
Now you can close MSPaint, you re done with it. Go back to your site, in "My Controls", click "Browse". Go find your avatar!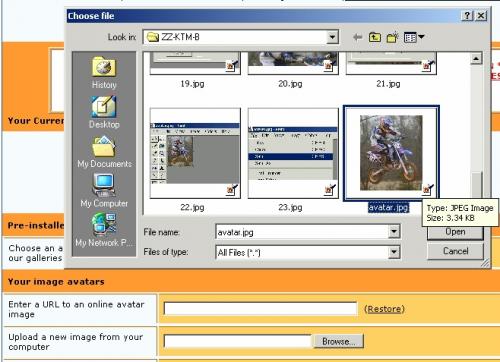
Select UPDATE AVATAR at the bottom and there you go! You're set!
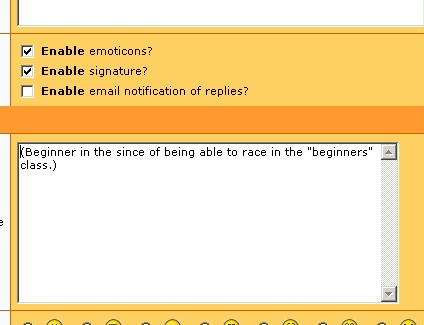
2.6 Signatures
Signatures are cool. You can put your bikes in there, your team (if you race), your sponsors, a funny quote you live by or basically anything you want depending on your site's rules.
Chapter Three: Searching is Your Friend!
I would be willing to bet that every question you could possibly have has already been answered. So, before starting a new thread, try searching for your answer first.
3.1 Searching for general forum info
At the bottom of every forum, there is a search option, just type in what you are looking for and hit "Go". Make sure you are in the proper forum, before doing the search.
If nothing turns up, try the next option.
3.2 Searching for specific forum info
Click "Search" at the top-right hand corner of the page: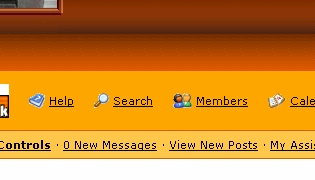
Fill in the blank, with whatever you're searching for. Single word searches return the best results. And select the proper forum to search in.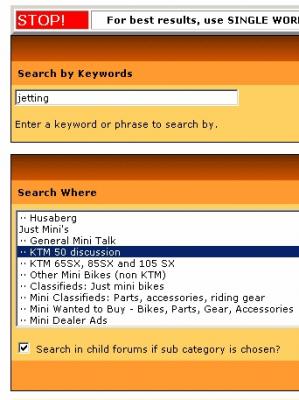
Select the time frame you want to search, and the rest of the options: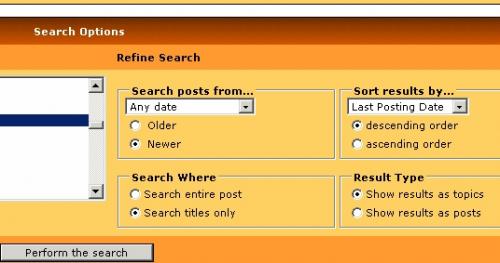
Select "Perform Search" and see what comes up!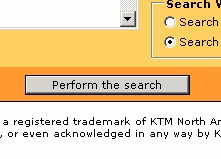
If it returns nothing, then go ahead and ask your questions. Or try a different word to search.
3.3 Searching for specific existing threads/posts
There is no easy way to do this. Other than to try and remember a unique keyword that was used in the thread, and do a search on it. Or to try and remember a user that posted in it and find all their posts. Do this by using the 3.4 below. Once you find the member, click on their name and select "Find all posts by this member" as shown in 2.2 above.
3.4 Searching for member names
Click "Members" on the top right corner of the page
Fill in the member name (or even part of it) and select the search style you want. I prefer "Name Contains"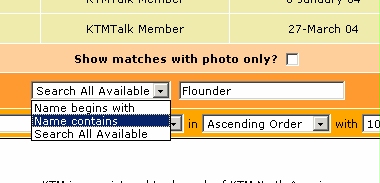
Select "Go" and you'll find your name (if you typed it in correctly)
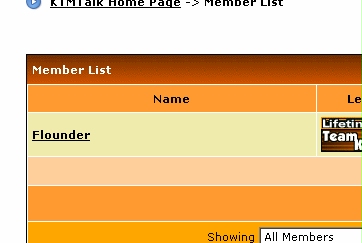
And there you have it
3.5 High Powered Search
Many have discovered a couple of quirks in the search engine here - it doesn't allow searches of under 4 letters, and won't do Boolean searches (multiple words together). For example, if you do a search for 'valve adjustment', it will return all posts with the words 'valve' or 'adjustment'. Here's a good work-around that will give you a high-powered KTMTalk search engine:
Go to Google, and choose "Advanced Search" next to the search window. On the resulting screen, enter your search terms in the "find results" area, then go down to where it says "Domain", and set it so it says "ONLY return results from the site or domain ktmtalk.com. (Fill in ktmtalk.com in the window there). You now have a high-powered search engine!
Chapter Four: The art of Quoting!
I'm sure you've seen the quoting around. And you were curious on how those professional computer guys do it, right?
| QUOTE |
| It's easier than you think |
4.1 Basic quoting procedures
You see a post you want to reply to, and you want to "quote" it.
Click the quote button on the upper righthand corner of the person s post.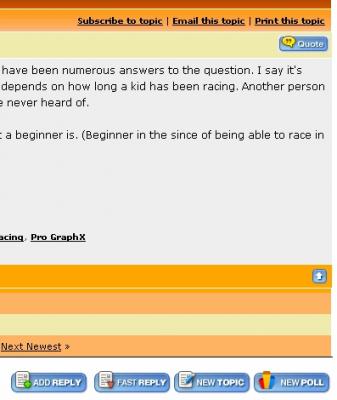
Write your reply.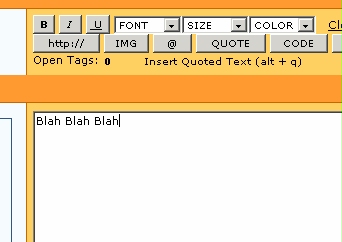
Hit "Add Reply"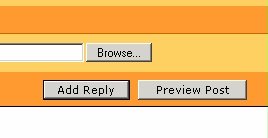
It's that simple!
4.2 Quoting a partial post
Follow the above steps, but also do this before hitting Add reply
Look down in the quote box, and remove whatever you don t want in there. If you only want to reply to one sentence in their post, then removed everything but that one sentence.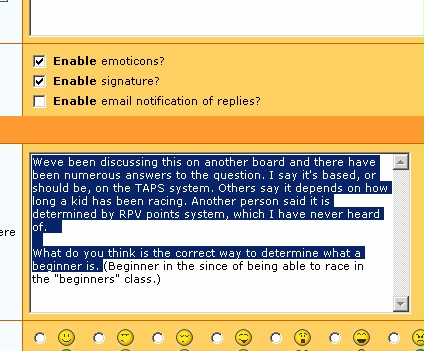
4.3 Quoting in multiple format (answer a post piece by piece)
This is a little trickier, but still easy.
First step: Copy the text you want to "Multi-Quote" (highlight, right click on the text, and select "Copy")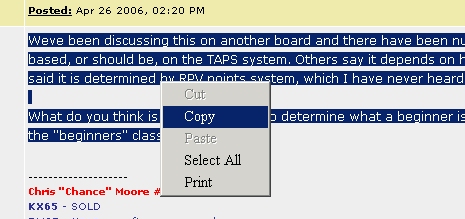
Next, Select "Add Reply" at the bottom of the thread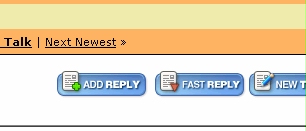
Then, paste the text into your new reply) right click in the white text box, select "paste"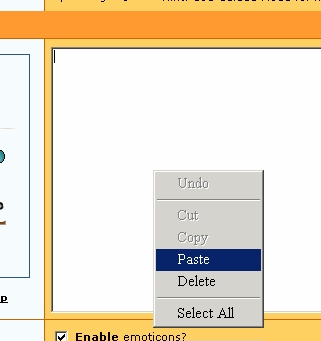
Now, simply remove all of the parts of the text you don't wish to reply to, if any.
Here's where it gets tricky.
Separate out all of the parts you want to reply to individually, so it s easier to organize. So they each start on their own line.
Now, highlight the first one, and select "Quote" from the gray buttons above the white text box, it will put the "Quote Tags" around it for you!
1) Before hitting "Quote"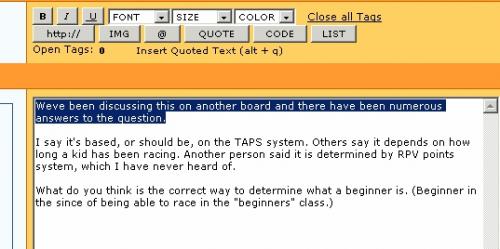
2) After hitting "Quote"
Now, reply to that individual quote:
Then do it to the next one, and the next one using the same steps as above, highlight, hit "quote" then reply and so on. It will look like this: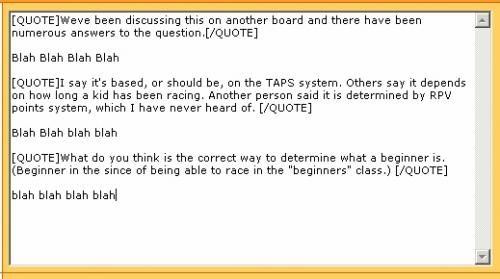
HIT PREVIEW BEFORE SUBMITTING!!!!!!!!!!!!!
After hitting preview: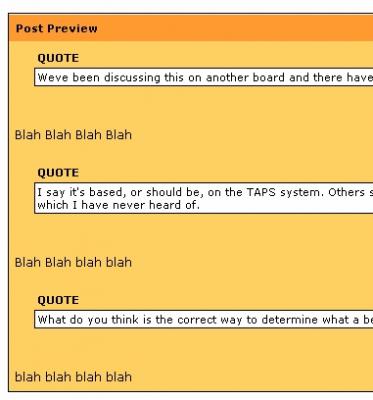
If you want to get really fancy, you can tell the readers who you're quoting!!!
Like this:
| QUOTE (Flounder) |
| See how it says "Flounder" above this quote? |
All you have to do is add "=NAME" to the opening tag. Inside the brackets. (This will vary from site to site)
Like this: 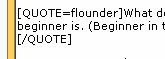
PREVIEW BEFORE POSTING!!!
4.4 Friendly quoting, don't be a noob!
PREVIEWING:
Have I mentioned Previewing? lmao!!! Don't look like a nOObie! If it doesn't look right, change it! Fix it!
QUOTING PICTURES:
When quoting a post with a picture, REMOVE THE PIC FROM THE QUOTE, you will make your fellow users happy.
Only quote the text that goes with the picture. Otherwise we ll have ten pics of the same thing on the same thread.
You can remove the pic by doing a regular quote, then down in the text box that holds the text to be quoted, remove the image tags [ img ] [ /img ] and the URL inbetween them.
Trust me, people with dial up, or a slow connection will THANK YOU FOR IT! 
Chapter Five: Posting Pictures!
Posting pictures is awesome. It adds some color to your post, lets you brag a little and just makes the post that much cooler.
Also, Posting pictures in Classifieds ads, could very well be the point at which your item sells or gets buried into cyberspace.
5.1 RESIZE that pic first!!!!
OPEN MSPAINT
FILE OPEN
SWITCH THE FILE EXTENSION TO .jpg (jpeg)
(do not use Bitmap (.bmp) files for anything on this site! They won't work!)
FIND YOUR PICTURE
Select "Open"
SAVE IT AS A NEW PICTURE
Save this as a new picture as a different name so you don't overwrite your original!
Just do a File - Save As .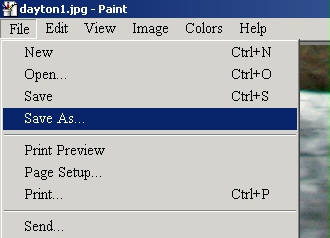
Now, give it a new name!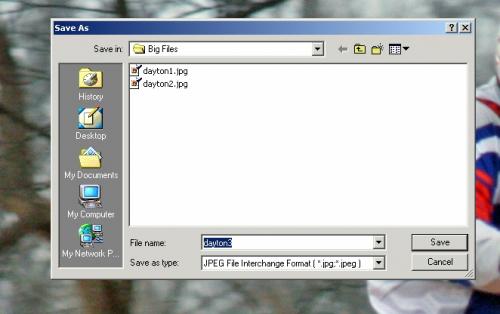
Hit SAVE and you're done with that! Your original is now safe!
RESIZE YOUR PICTURE
How big is it now? Click Image then Attributes 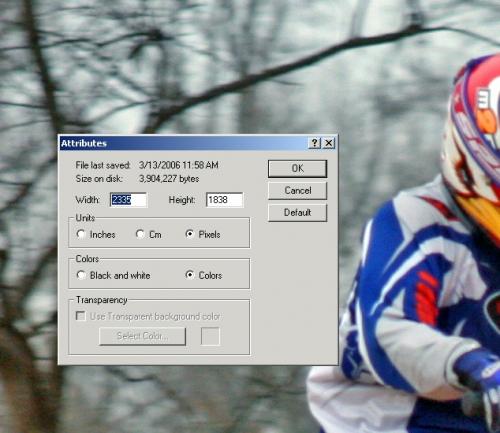
Now, the size you want it at is a max of 800 pixels wide. (This way, people won't have to scroll to read the posts!)...
I prefer to do all of my pics on the site at a width of 640. Just makes it easier on everyone, but admin's guidelines are a max width of 800 pixels (dependant upon site)
So, what you will have to do here is take the width value shown, and find out what percentage you will need to scale it down to.
My width value is 2335 pixels.
So, I will take 640 devided by 2335, and I get around 27%. Round the percentage down to the next whole number, not decimal points.
So, I need to scale my avatar down to 27% of it s original size to fit the width of 640 pixel preference.
To scale it, DON'T CHANGE THE ATTRIBUTES. It won't work.
You need to Stretch/Skew it, under the Image menu:
Under the Stretch box, change the horizontal and vertical to your percentage to be scaled down to. Mine was 27%: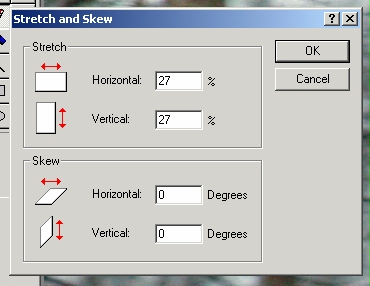
Select OK and you should have your picture ready to go! 
Now, save again. This time do this by doing a quick save :
Now you can close MSPaint, you re done with it. Go back to KTMtalk to start the next section on UPLOADING
5.2 Uploading from your computer
Step 1:
Make sure your picture is sized correctly. You should be okay as long as the width of your picture is less than 700 pixels.
Step 2: Uploading
Go to the top of the page, and click "Photo Gallery"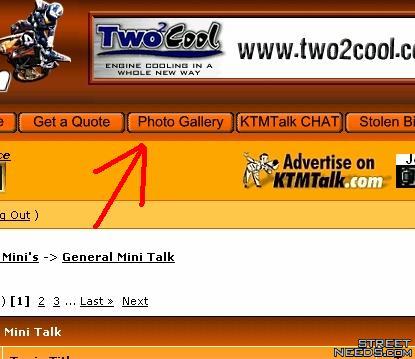
Click on the desired category your picture will fall under: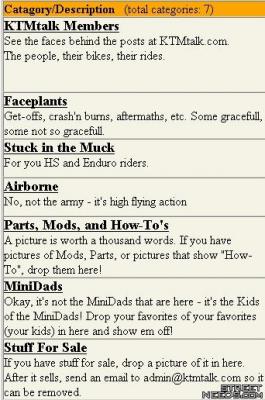
Click "Add New"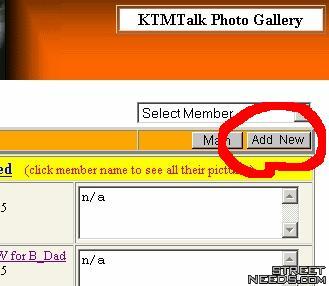
Click "Browse"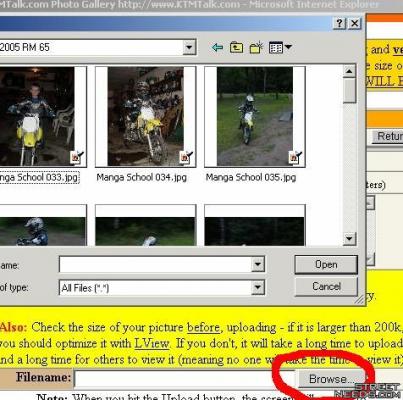
After hitting Browse, find your picture on your computer.
Then hit "Upload"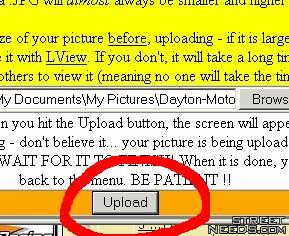
Step 3: Creating the IMG address
After your pic is loaded into the gallery, click on it: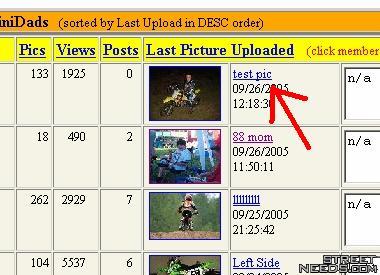
Then, on top of your pic, you'll see a link, click on it: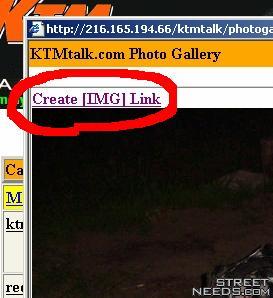
Another box will pop up with your entire URL (address) for your pic and it should already be highlighted, if so, right click on it, and hit "copy". If not, highlight the entire url and right click & copy.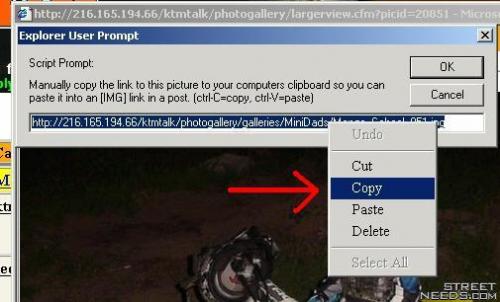
Step 4: Posting your Pic
Now, go into your post, and click the IMG button: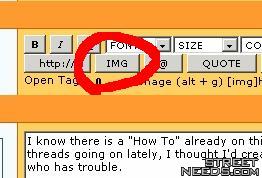
Right click in the white text area and hit "Paste"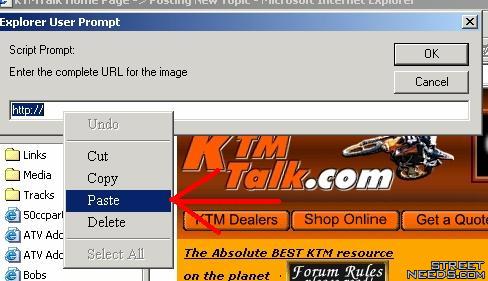
Hit OK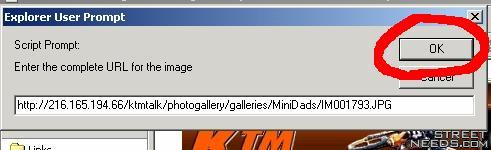
It will appear in your post like this: 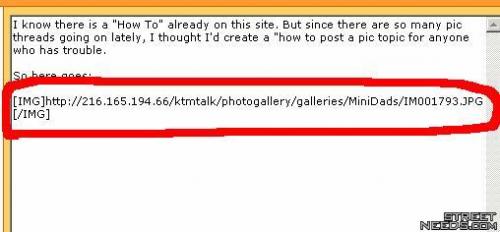
When you hit "Post New Topic" or Post Reply to submit your messge, it will appear in the post, not as a link.
5.3 Hotlinking (Posting pics from a different website)
You can pull pics from anywhere. Some sites do not appreciate people stealing their pics, but some think it's okay .
My rule of thumb is, if I can pull it up on Google, it's "Okay"...
So here's what I do when looking for a pic.
I go to Google
Click the Images option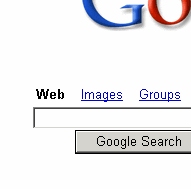
Type in what I m looking for: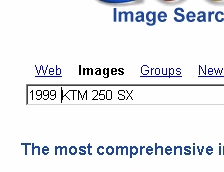
And here are my results: Google Results
I click on one pic I want, this time, I'll do this one:
Then, click See Full-Sized Image 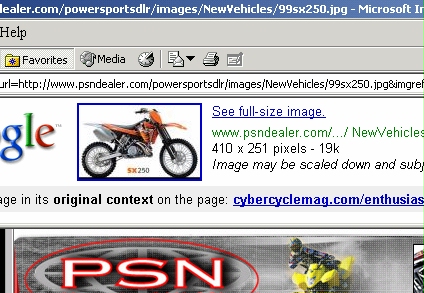
When the full sized image appears all by itself. Copy the url in the address bar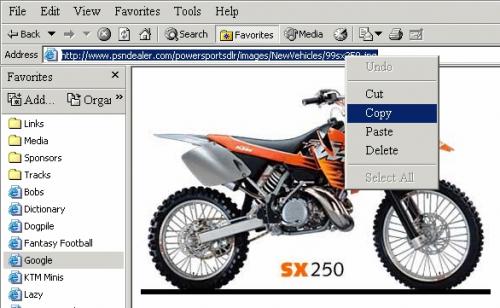
Then, return to the thread you want to use it in, click the gray image button:
A box will pop up, clear out the http:// that already exists in there and right click PASTE like this: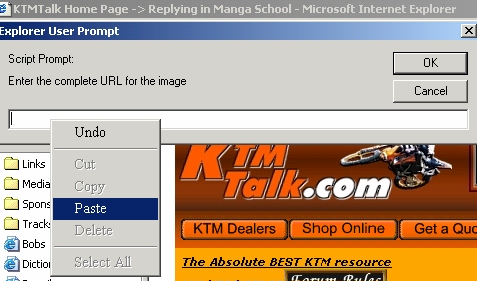
Click OK and it will automatically put your image script in the post. With the IMG tags already on. It will look like this: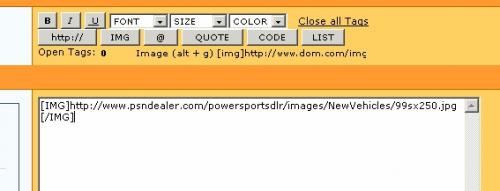
And there you have it, write your message under it, or above it, whatever you want, JUST DON'T MESS WITH THE IMG TAGS (or it won't show up)
When all said and done, it will look like this in your post:
And that is how pictures are posted.
You can put more than one in a single post, but try not to exceed 5 per post, as that would make for one difficult page to load on a slow connection.
Chapter Six: Other Basic Posting Procedures
6.1 Linking
There are two ways to link.
The first way is to copy the website address and paste it into the reply text box. It will show up as a clickable address.
The second way is more fancy, these are the links that show up as a business name, or whatever else you want it to show up as.
Here's how you do it:
First, open the page you want to link to and copy the URL at the top of the page, for example, I'll use the KTM 50cc Bible.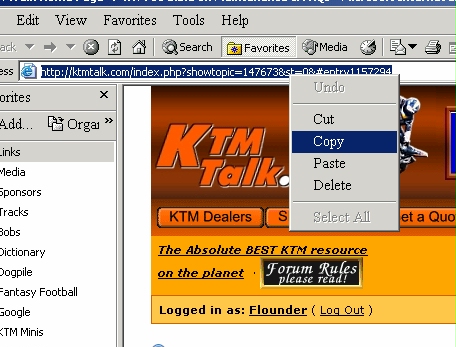
Next, go to your reply box, and click the http:// button: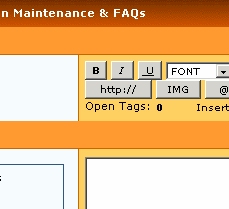
A box will appear, remove the existing http:// and right click - paste the URL into that text area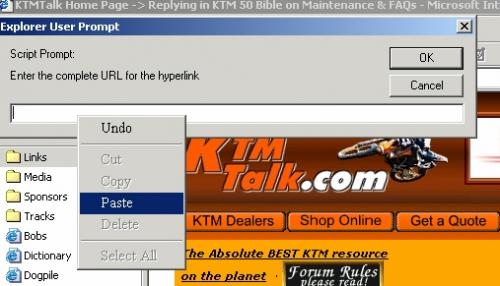
Your url will now be into that space. Click OK . Now type in what you want to appear in your post in place of the URL (the clickable text)
Click OK again and it will automatically be inserted into your post. Like this: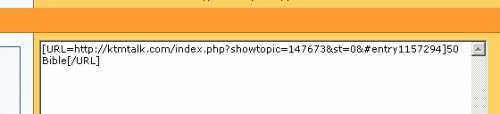
After you post your message, it will show up like this:
50 Bible
Done!
6.2 Bold, Italics, Underlining, Font, Size, Color etc...
Highlight the text you want to format, and click the desired button, the tags will now appear around the text you highlighted. I ll do a Bold format, I highlighted the text, and click the B Button.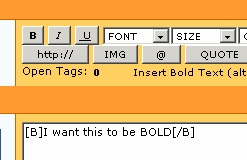
If you need more help with this, shoot me a pm or reply to this thread and someone will help you out!
6.3 How do you edit your post after you ve posted it???
Go to your post, and click the EDIT button on the top right hand corner of the post, if that button is not there. Then you can no longer edit it. There is a time frame you are allotted to edit your post, if that time expires, you can no longer edit your post.
6.4 Subscribing to topics or forums, or download a topic?
Click the button at the bottom of the thread that looks like this:
It will explain what the options do, and how you use them
Chapter Seven: Miscellaneous Tips & Tricks
7.1 Screen Capture
Screen capture is a trick people use to make threads like I just did. All of those pictures of ktmtalk I posted in this how-to are screen captures. I have a screen capture software on my PC, but anyone can do it from anywhere.
Make a copy of the entire screen as it appears on your monitor
1. Locate the "Print Screen" key on your keyboard.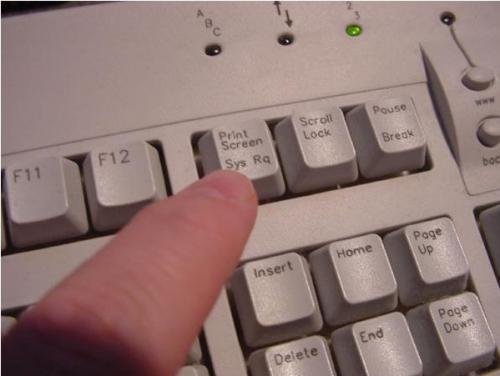
2. Bring the screen you want to capture forward placing all windows behind it. If it is the only window available then maximize the window so it covers the entire screen.
3. Press the "Print Screen" button on your keyboard.
4. Next open Microsoft's Paint Program clicking on "Start" then "Programs" then "Accessories" and finally "Paint". 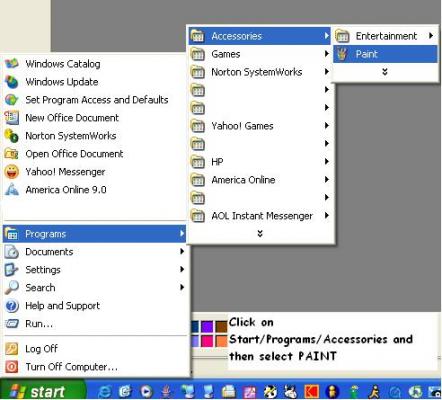
5. Once the program is open click the "File" then select "New" to open a new screen. You can also use your keyboard and press the "CTRL + N" keys. 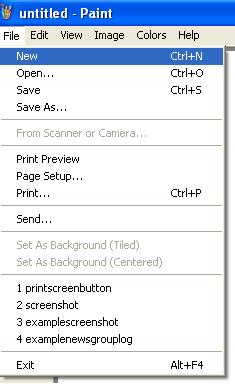
6. Next click "Edit" then "Paste" to paste the screen you just captured. You can also use your keyboard by pressing the "CTRL + V" keys to paste. 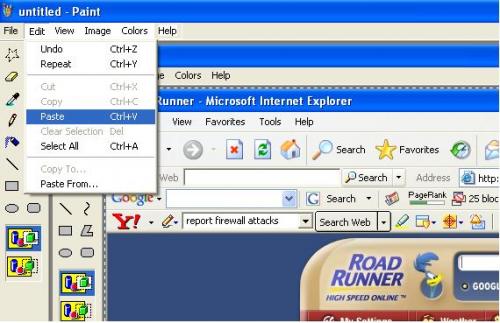
7. Once the screen is pasted you will want to cut out the area of the image that you need or the image will be to large. To draw a box around the area click the dotted box located on the left side of the screen by the other tools. Look at the image below. 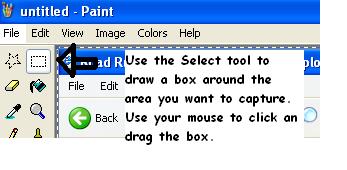
8. After selecting the dotted box take your mouse and left click on the area you want to cut out of the document. Hold the left click down on the mouse and drag it across the area that you wish to remove. See the image below. 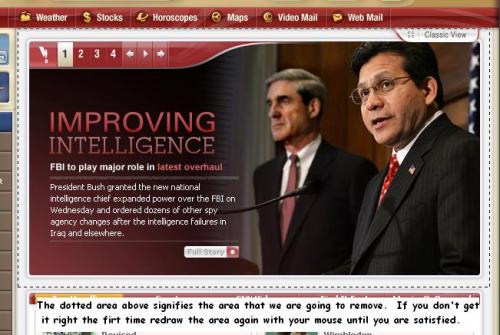
9. After you have highlighted the area that you wish to remove next you will be cutting the area and pasting it in to a new area. Now you can either use your keyboard to cut and paste or you can use the menu system. With your keyboard press "CTRL + X" or with your mouse click on "Edit" then "Cut". See example below. 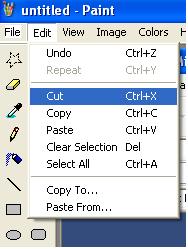
10. Next you will need to make a new area to paste the selection you have just cut away. Using your keyboard you can press "CTRL + N" to make a new window or using your menu system click on "File" and "New". You will be asked if you want to save your current file just click the "No" button and your new area will appear. After the new area appears using your keyboard press "CTRL + V" or using your mouse click on "Edit" then "Paste" and your new selection will appear in the white box.
"NEW FILE"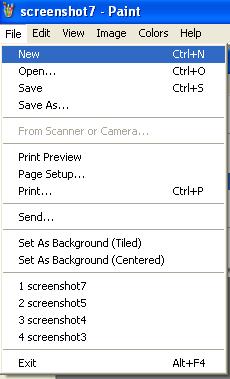
"PASTE"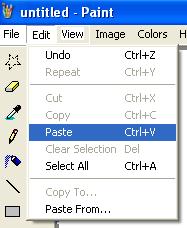
Image Pasted
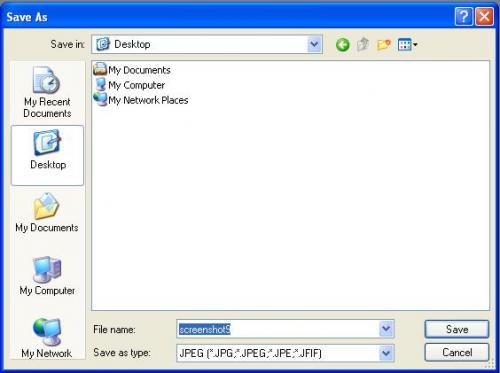
11. If your image doesn't cover the entire white box you can click the outer edge of the white box which will bring up small dots around the white box area which you can adjust with your mouse by clicking on one of the dots and sliding the white area in or out to fit around your image. After you are finished working with the image you will need to save the image. There are several formats which you can save the image. It is recommended that you save the image as a .jpg or .gif file. Those file formats are widely used and are preferred choice. See example below. 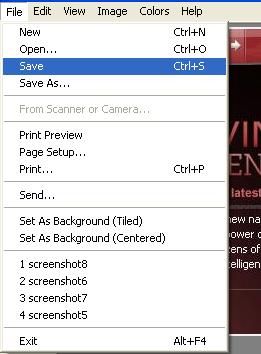
12. There are many other things that you can do with paint such as draw shapes, or add text which is something you will need to read the help section on for more help. This concludes this tutorial on how to create a screen shot.
Any questions, pm me any time!
This section borrowed from http://www.rrsecurity-abuse.com/screenshots.html
7.2 See what your buddies are doing on the site
At the bottom of the main page, there s a list of online users. If you want to know where they are on the site, or what they re doing, just click either member name or last click . Member name will sort them in alphabetical order so you can find whoever is online to see what they're reading.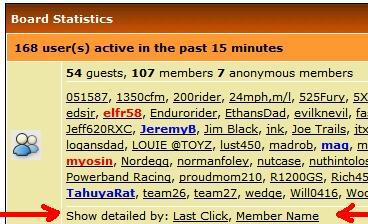
Click Member Name and it will bring you to this: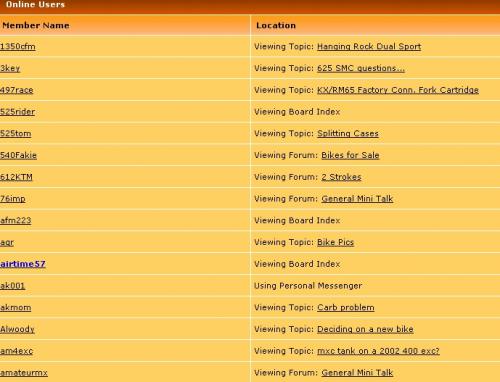
7.3 Enjoy!
And there you have it! No more confusion!!! And no more NOOBIE posts!
Hope this helped you in some way or another!


 Views : 11165
 Comments : 0
 Rating : None
 Last Updated : Aug 7, 2007

