Using Picasa to Share Your Photographs
Sharing Via E-mail

To send a photo using e-mail, first launch Picasa and select the photo (or photos) you wish to e-mail. Next, click on the Email button at the bottom of the window, or choose Email from the File menu. Then do one of the following:
- To use your default e-mail client, click on the top button in the Select Email dialog box. (This button will have the name of your default e-mail program on it. A default e-mail program is designated in Control Panel > Add/Remove Programs > Set Program Access and Defaults > Custom.) The default e-mail program will launch and a new e-mail message with the selected photograph(s) attached will be open and ready for you to address and send.
- To use Gmail (gmail.google.com), click on the Gmail button and sign in to your Gmail account. A new e-mail message with the selected photograph(s) attached will be open and ready for you to address and send. (Note that Gmail is a free, search-based webmail service that includes 1 gigabyte of storage. Currently, you can only get a Gmail account if you are invited by somebody who already has a Gmail account. Alternatively, visit http://isnoop.net/gmail/ to see if invites are available.)
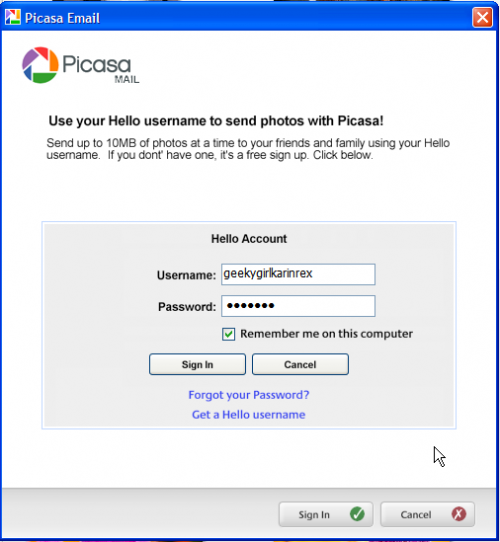
- To use Picasa's built-in e-mail client, click on the Picasa Mail button. You must have a Hello username to be able to use this client. If you don't already have a Hello username, just click on the Get a hello username link and sign up - it's free and only takes a few seconds. Once you've signed in, Picasa Mail will launch and a new e-mail message with the selected photograph(s) attached will be open and ready for you to address and send.
Sharing Via Hello!
Hello (http://www.hello.com) is a free instant messaging tool from Google that is optimized for sharing photographs instantly using a peer-to-peer connection. For Hello to work, both the person sending the photos and the person receiving them must have Hello installed and active on their computer. The recipient does not need to have Picasa running, but it does make for a few less clicks. If Picasa is running, all that is needed is a single click to switch to the program; if Picasa is not running, the recipient will have to use the Hello Browse command to locate and import the pictures to a location on their hard drive.
To share a photo using Hello, first launch Picasa and select the photo (or photos) you wish to share. Next, click on the Hello button at the bottom of the window, or choose Send to Hello from the File menu. The Hello program will launch and you can choose one or more recipients to share the photo with from the list in the Select the friends to send pictures to dialog box. Click on Send, and you're done!
Hello lets you chat with multiple friends simultaneously, as well as to save and review chat logs that include any pictures that were exchanged. You can learn more about the Hello program on their support page: http://www.hello.com/support.php
Sharing Via Blogger
Google's Blogger (http://www.blogger.com) lets you create your own blog (web log) where you can post your thoughts as well as your photos. The Blogger button in Picasa lets you to post pictures to your blog in only a few quick clicks. To use this feature you must have a Hello account and an active blog.
To post a picture to your blog, first launch Picasa and select the photo (or photos) you wish to post. Next, click on the Blogger button at the bottom of the window. Sign in using your Blogger username and password. (Once you've linked an active blog to your Hello account, it will appear in the Bloggerbot tab whenever you start Hello.)
Click on the Settings button (if necessary). Under the Size Settings heading, choose the desired Inline Image Size and Archive Image Size. Under the Post Settings heading, choose the desired Caption Order and Border settings. Under the Advanced heading, choose the desired attribute. For help on any of these settings, click on the Help button. Click on the Save button to save the selections.
On the lower right side of the BloggerBot screen, under the Enter a caption for your photo here heading, type a caption for your picture and then click Publish.
You can learn more about the Blogger program on their knowledge page: http://www.blogger.com/knowledge/
Coming Up...
Look for my other Picasa tutorials!


